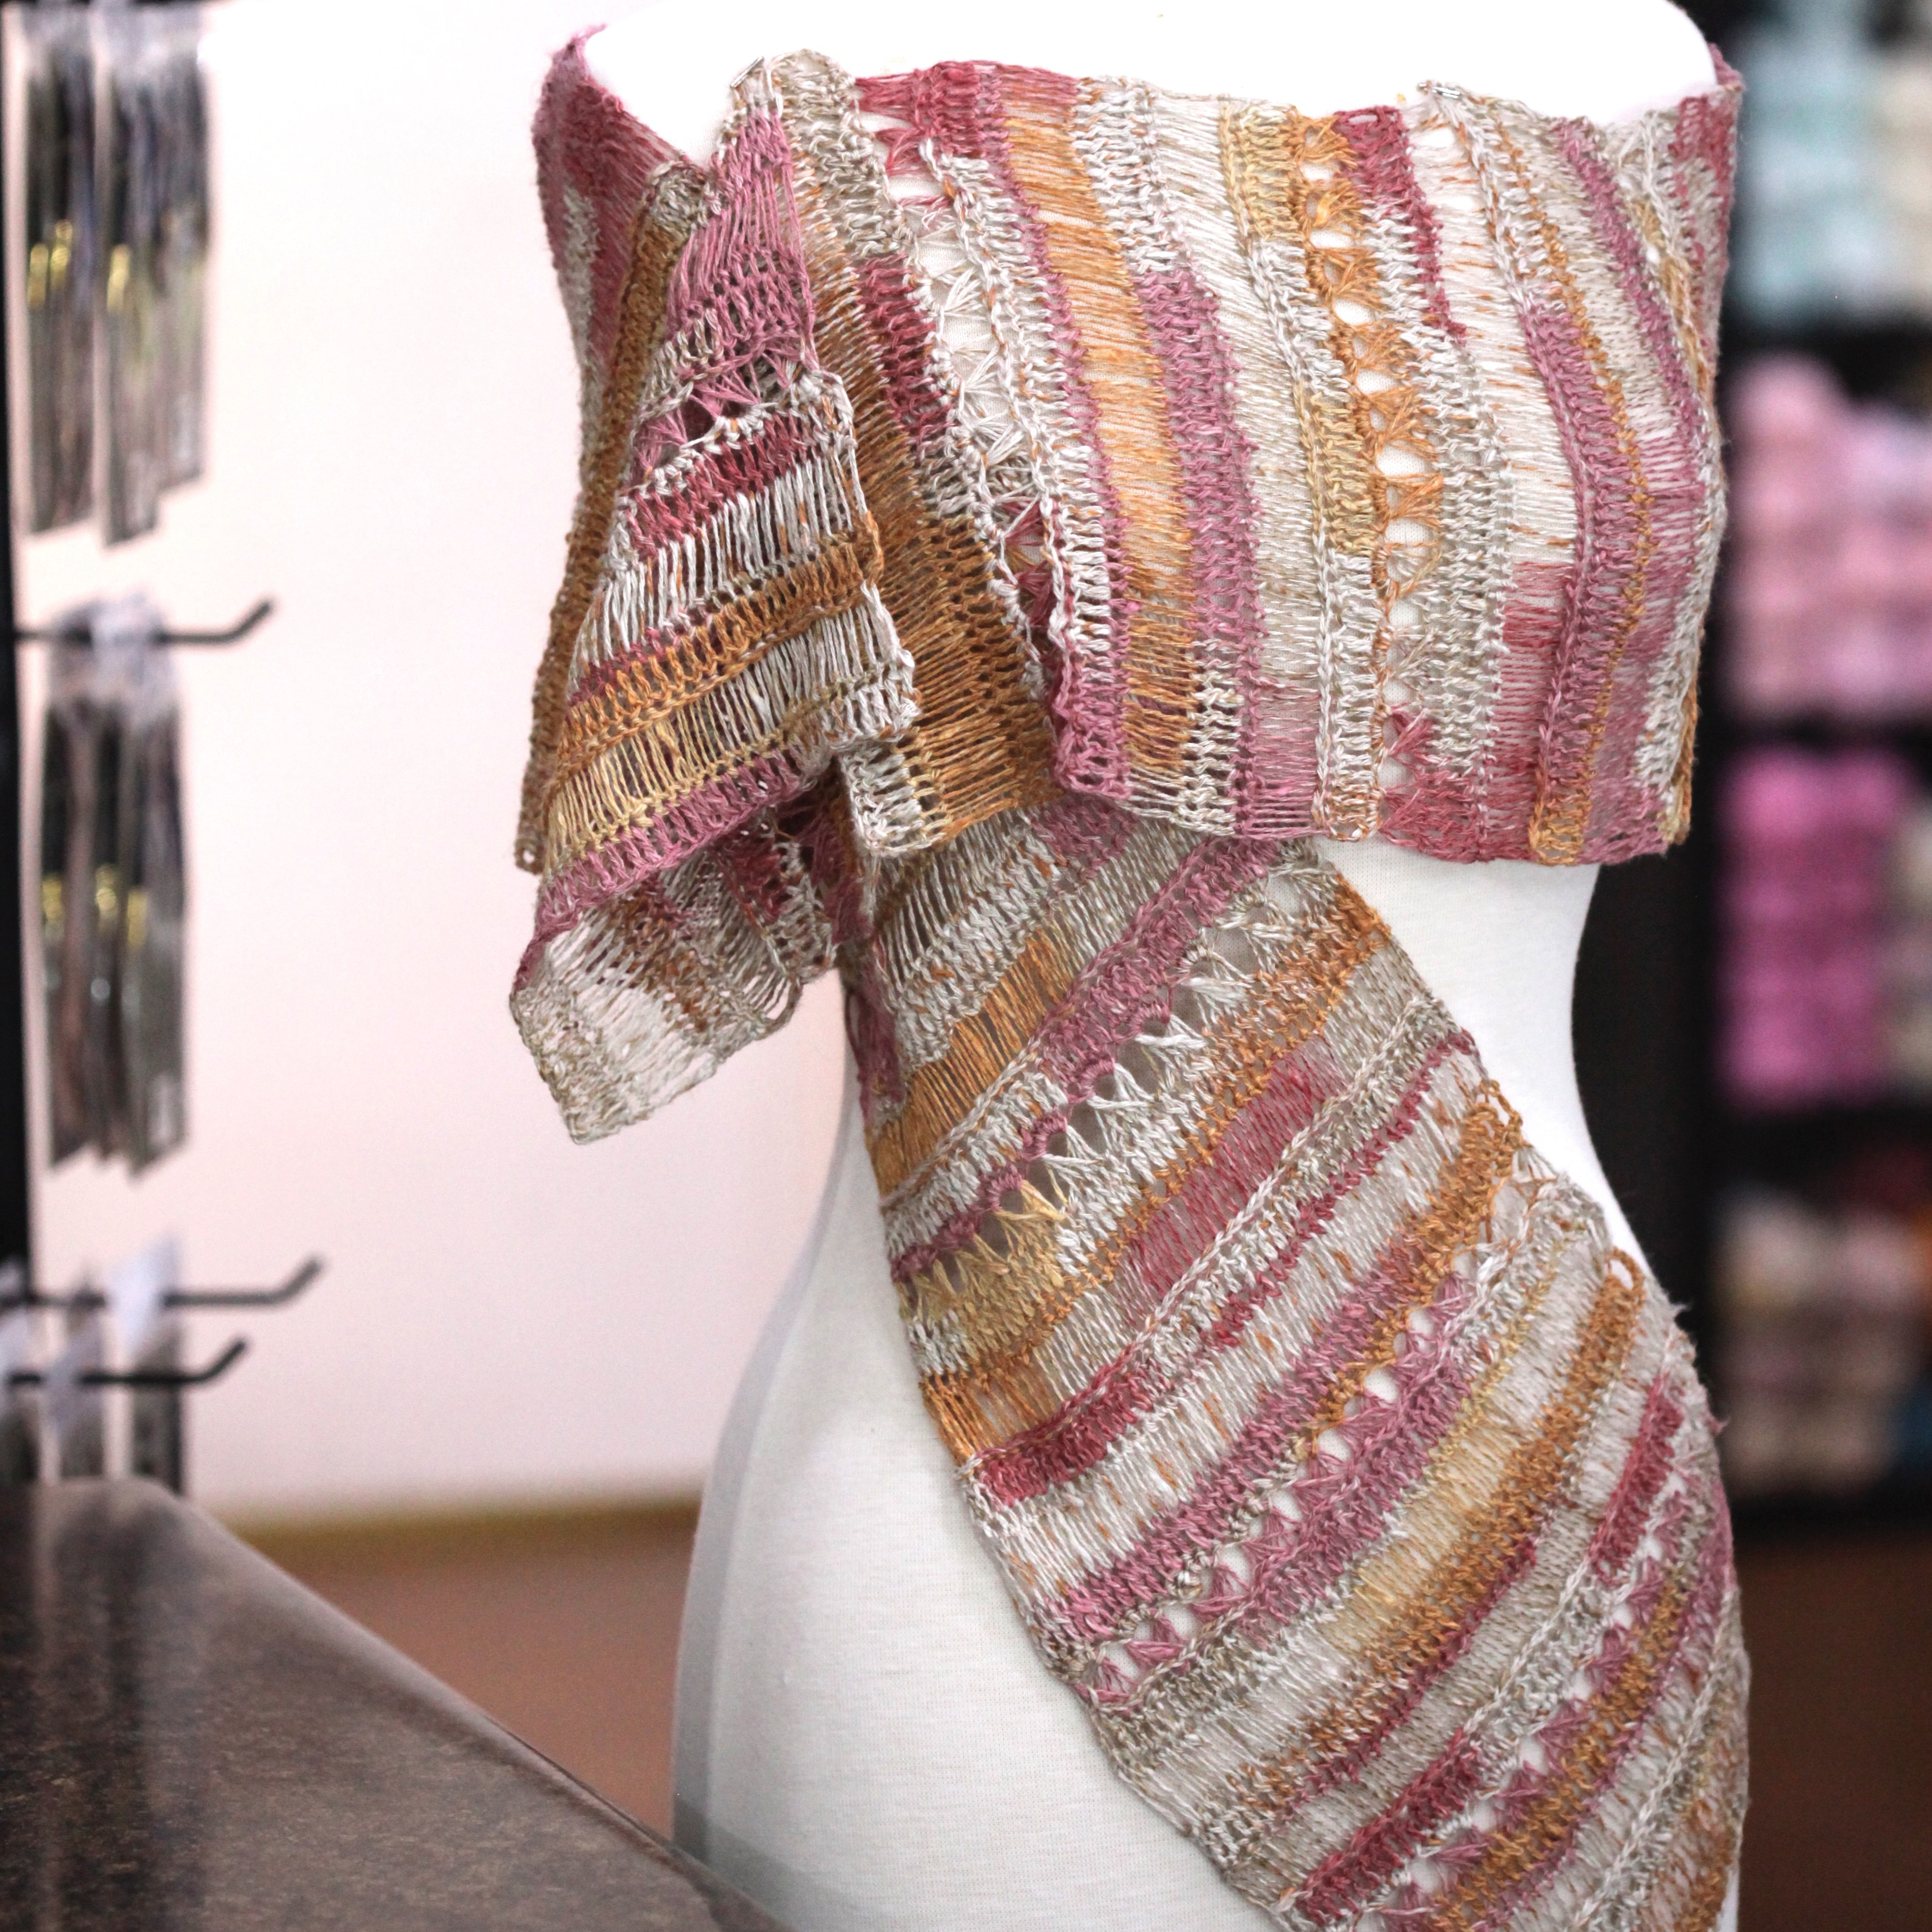
I’m so excited to introduce my newest design! It’s a shawl! It’s a scarf! It’s a SHAWLETTE! I love how this turned out. It’s long and narrow. You can wear it loose around your shoulders for cool fall nights or bundle it around your neck when it gets colder.
I used 3 skeins of Luxe Sock yarn by @jemsluxefibers. The design features a spike stitch pattern with crocheted linen stitch stripes and a ribbed edging all around. The smart unisex design is perfect for anyone!
The pattern will be released November 9th with a special event for a few lucky stitchers! Details are coming later this week!
2020 has been something else, hasn’t it?! I don’t know about you, but I’m looking forward to the end of the year! There has to be a light at the end of this tunnel. And it should have something to do with Christmas. And yarn. How about a crochet along?
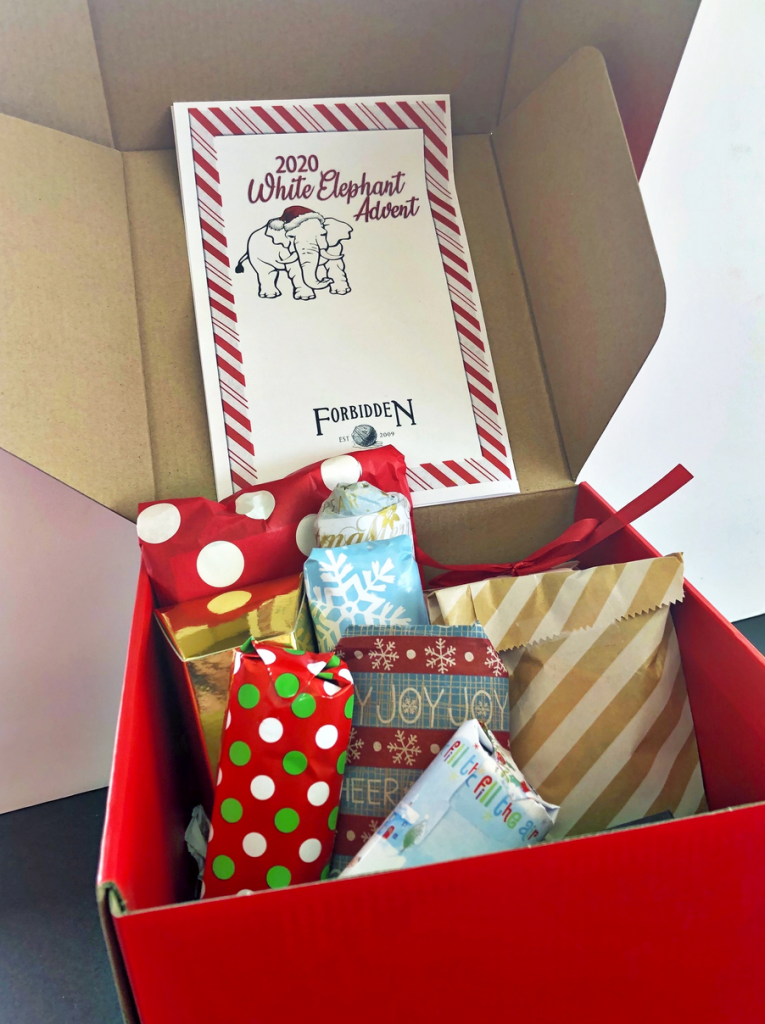
Forbidden Fiber Company is introducing this year’s advent calendar, and it’s gonna be so fun! It’s a White Elephant Advent Calendar! Have you played a White Elephant or Dirty Santa gift exchange? It’s like that. You choose a squishy present out of the box and see what you get. If you like it, you keep it to use in your pattern today. If you don’t, put it back and choose another! The catch is, you eventually get to keep them all!
The White Elephant Advent Calendar comes with everything you need to complete a surprise pattern by the end of the month: 18 coordinating hand-dyed mini-skeins, A MKAL (knit) pattern designed by Afifa Knits OR MCAL (crochet) pattern designed by me, Katie Clark, and a few extra goodies throughout the month.
If you choose the crochet option, find me on Facebook along the way for help, tips, and a good time! Are you ready to get started? Find the MCAL pattern here.
It’s Fri-yay! AND…it’s my day for the Summer Blog Hop! Here is today’s free pattern, the Espartina Scarf, a light beachy wrap that features a crochet “drop stitch” motif. It’s available free today, June 26th, 2020, only. But if you missed the promotion, don’t worry! It’s available for purchase all the time on my Patterns page.
Have you been productive during the Shelter-In-Place? Did you start to tackle projects or to-do lists you’ve been putting off? Or have you perfected your procrastination skills by avoiding chores when you can’t even leave your home?
I’m the eternal procrastinator! I have projects and tasks that “I’ll get to one of these days.” Some are fun, like getting around to that design that’s been floating around in my head. (Hopefully, you’ll see the product of some of those soon!) Some are working through yarn in my stash. Some are just chores I don’t want to do so I avoid them like the Coronavirus! Ha!
Well, the last two things just came together! I had a bag of various scrubby yarns I’d been waiting to work up and try out. I finally found some time to make kitchen scrubbies. Now, I hate housework, but it’s a little bit better when you have good tools that do the job. I love my handmade dish cloths, and I expect I’ll love these scrubbies as well.
So, here are a few patterns for your scrubby yarns that are good for your kitchen or your bath. Plus, I’ve added a few options you may want to try out for yourself!
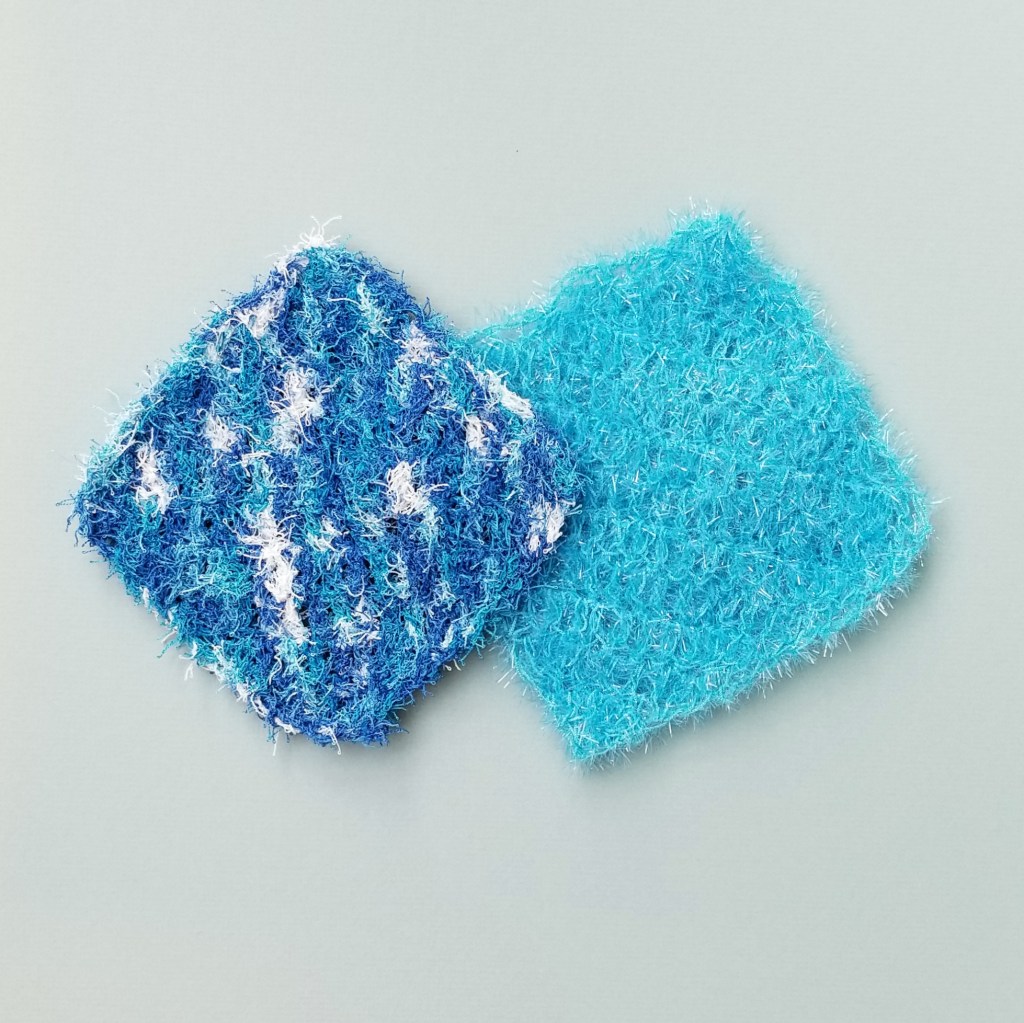
Scrubby Square
Scrubby Square with Eyelet Edging
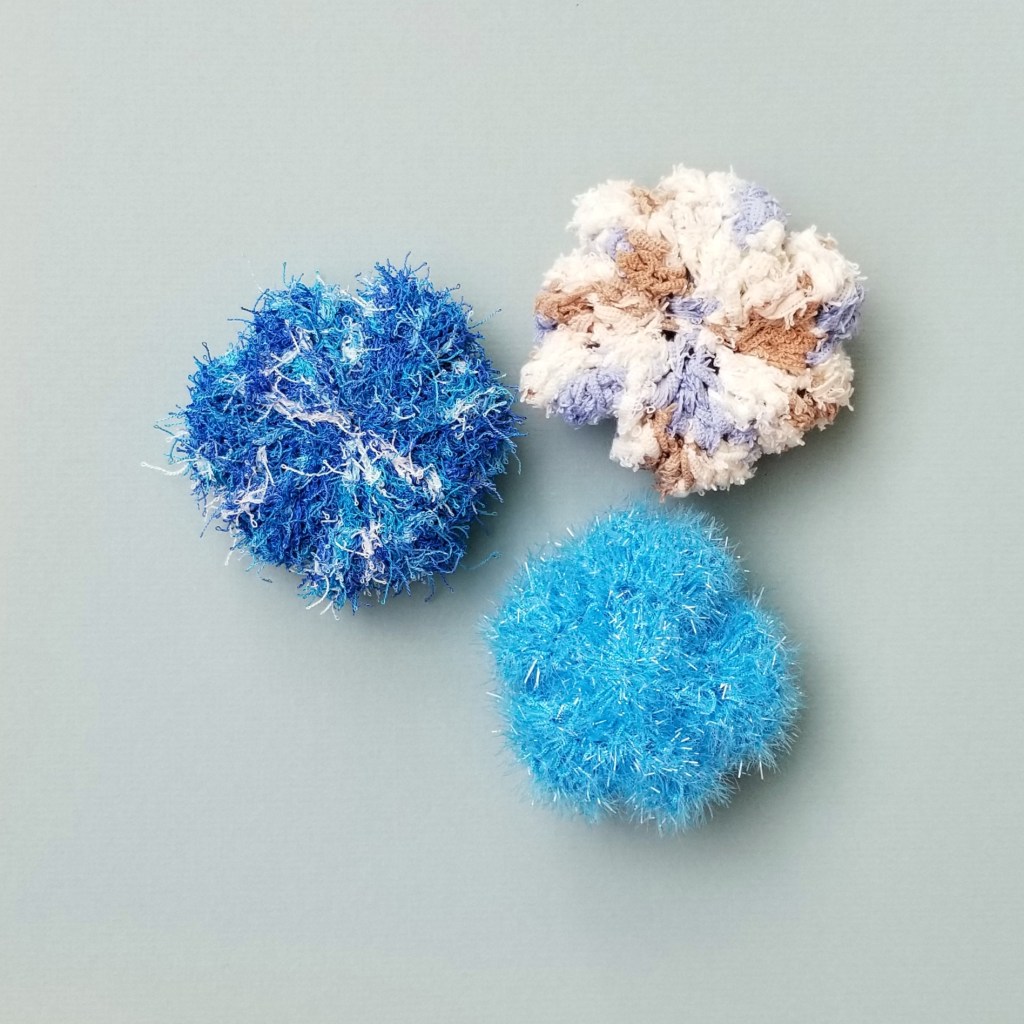
Scrubby Pouf
Materials
Scrubby yarn (one ball will make 2-3 scrubbies) or cotton dish yarn US I Hook or hook for Basic Crochet Supplies Tapestry Needle
Scrubby Square
Ch 4, 4 dc in 4th ch from hook. Turn. -4 dc
Ch 3 (does not count as dc), 3 dc in 1st st, dc to last st, 3 dc in last st. Turn. -8 dc
Rpt last row until you have 24 sts. Begin decrease rows as follows.
Ch 3, dc3tog, dc to last 3 sts, dc3tog. Turn. -20 dc
Rpt last row until you have 4 sts left.
Last row: Ch 2, dc3tog. Finish off. Weave in ends.
Option: Replace the double crochets with front and back post double crochets for more scrubby ridges. Work bpdc on the right side and fpdc on the back side.
Scrubby Square with Eyelet Edging
Ch 5 (counts as dc & ch-1 sp), dc in 5th ch from hook. Turn. -2 dc, 1 ch-1 sp
Ch 4 (counts as dc & ch-1 sp throughout), dc in first st, dc in ch-1 sp, [dc, ch 1, dc] in top of turning ch. Turn. -5 dc, 2 ch-1 sp
Ch 4, dc in first st, dc in ch-1 sp, dc in each st across to ch-1 sp, dc in ch-1 sp, [dc, ch 1, dc] in top of turning ch. Turn. -9 dc, 2 ch-1 sp
Rpt last row until you have 25 dc. Begin decrease rows as follows.
Ch 2, sk ch-1 sp, dc in each dc across to 1 st before ch-1 sp, dc2tog the next st and the last st skipping ch-1 sp. Turn. -23 dc
Ch 2, sk first 2 dc, dc across to last 3 sts, dc2tog the next st and the last st skipping 1 dc. Turn. -19 dc
Rpt last row until you have 3 sts left.
Last row: Ch 2, sk next st, dc in last st. Finish off. Weave in ends.
Option: Red Heart’s Sparkly Scrubby yarn isn’t very absorbent. To make a more cloth-like scrubby, hold it together with an all cotton yarn. Be sure to go up at least 2 hook sizes.
Scrubby Pouf
Work in rounds.
Ch 4, 24 dc in 4th ch from hook. Join w sl st to first dc.
Ch 3 (does not count as dc), 3 dc in each st around. Join w sl st to first dc. -72 dc
Ch 3, dc3tog around. Join w sl st to first dc. -24 dc
Rpt last rnd once. -8 dc
Finish off. Use a tapestry needle to stitch last 8 sts closed. Tie firmly. Thread end into center of pouf.
Option: For a soap saver, work the first round of double crochets around a small elastic hairband. When you are done, insert a sample size soap into the center through the elastic.
I know these times are stressful. We are dealing with work and kids and dishes…the DISHES! (Does your family want to eat every day like mine?)
And everybody deals with stress differently. Some bake bread, filling the house with that delicious aroma. You might escape the circumstances by binge watching a show or getting lost in a book.
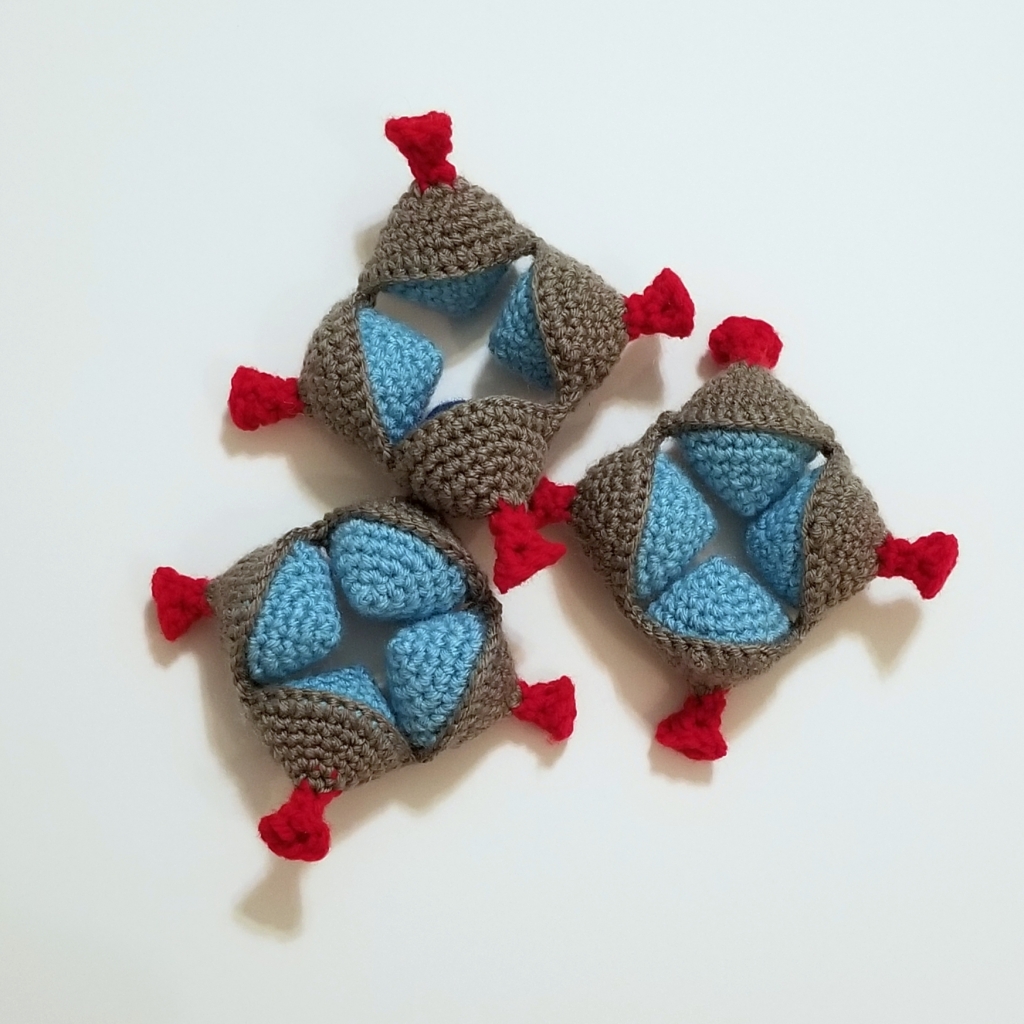
I’m the kind that deals with stress by making irreverent fun. So here’s the result of my stress crocheting….
The Coronavirus Amish Puzzle Ball!
Start with the virus. Discover how to destroy the virus. Then discover a cure!
Fight the virus!
Wash your hands to destroy the virus!
Discover a cure!
Finished Size: Approx. 5 inches Materials: Worsted weight yarn (#4) 1 ball red, 1 ball gray, 1 ball any color for the cure side (CC) US G hook Polyester fiber fill Basic Crochet supplies (scissors, tapestry needle, etc.)
Gauge: not critical
Abbreviations:
beg – beginning ch – chain lp – loop m – marker ML – magic loop rnd – round rpt – repeat sc – single crochet sc2tog – single crochet 2 together sl st – slip stitch st – stitch
Cure Side
Using CC, beg w ML.
Rnd 1: In ML, ch 1, sc 4 in lp. Do not turn. 4 sc
Note: Do not ch 1 at the beginning of rnd here and throughout. Work in a spiral. Use an open m to mark your beg of rnd.
Rnd 2: 2 sc in each st around. 8 sc
Rnd 3: [2 sc in next st, sc in next st] 4 times. 12 sc
Rnd 4: [2 sc in next st, sc in next 2 st] 4 times. 16 sc
Rnd 5: [2 sc in next st, sc in next 3 st] 4 times. 20 sc
Rnd 6: [2 sc in next st, sc in next 4 st] 4 times. 24 sc
Stop here or continue in pattern for a larger finished project. Finish off. Hide ends.
Make 12 pieces.
Virus side
Note: The beginning of this piece is very fidgety. If it’s too frustrating, use Gray to make pieces just like the Cure Side. Then use a lark’s head or other knot to attach short pieces of red yarn to the centers of each gray piece.
Using Red, ch 8, sl st in bottom lp of beg ch to form a lp.
Rnd 1: Ch 1, sc2tog around. 4 sc
Rnds 2 & 3: Sc around. Finish off changing to gray in last st.
Continue as for Cure Side starting with rnd 2.
Make 12 pieces.
Assembly
Using gray, hold 1 virus side and 1 cure side with wrong sides together making sure the cure side is closest to you. Working through both layers, join with a sl st. Ch 1, sc in same st and next 12 sts.
*Hold another pair of virus and cure sides together with the cure side closest to you, and working through both layers and beg in any st, sc in 13 sts. Rpt from * until 4 sections are attached. Join to beg sc being careful not to twist work.
Rotate work to continue around the other half making sure the cure side is still closest to you. * Sl st in top of first sc of next section. Working through both layers, sc in same st as last sc, sc in next 11 sts stopping halfway to stuff section, sc in same st as next sc. Rpt from * around. Join sl st to beg st. Finish off weave in ends.
Rpt 2 more times to make 3 rings with 4 sections in each ring.
Need a hint to put it together? Coming soon! Try it yourself first!
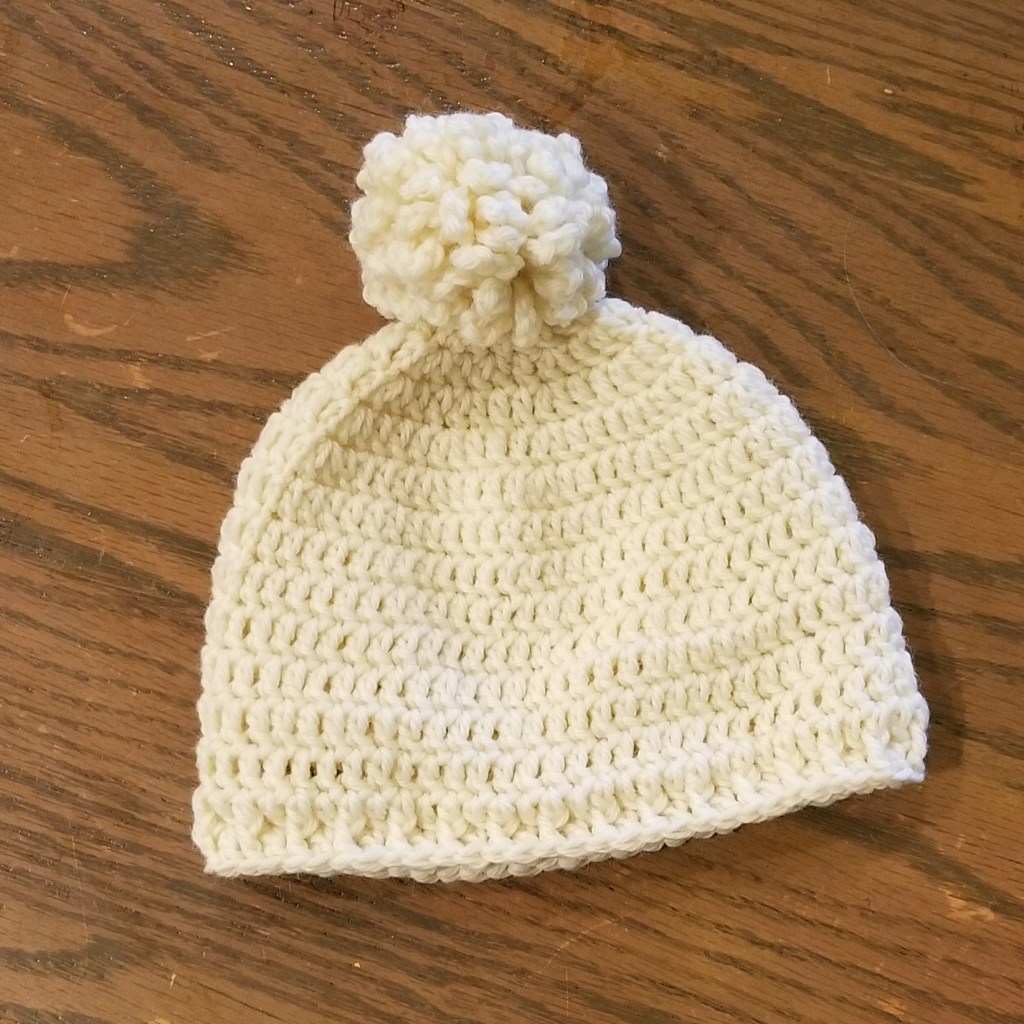
Pom poms are adorable on a hat or ends of a scarf, so here’s an improvement on a classic. The Game Changer Crocheted Pom Pom!
Why is this pom better?
• It is washable and dryable Because it has no loose ends, as long as your yarn can be laundered, so can this pom pom be laundered.
• It can be made with any yarn Most pom poms are made with wool yarn because the wool fibers cling to each other and keep it from falling apart. This one is made with a crochet chain, so it’s structurally sound. That means you can use any yarn, even a novelty yarn, and it won’t fall apart.
• It’s child proof Do you have a kid that picks at everything? Then you know, if you pick at a pom pom, the pieces fall out! This pom pom cannot be pulled apart.
Now you know you need one! How do you make it? Look no further.
Game Changer Crochet Pom Pom
This pattern makes an approximately 3 inch pom pom. To make a larger pom pom, use longer chain loops in round 2. To make it smaller, use shorter loops.
To make a full pom pom, the sts have to be squeezed in. It can be difficult at the end, but the more chain loops you squeeze in, the fuller the pom pom will be.
Rnd 1: In a magic ring and leaving a long tail, ch 1, 20 sc, join with a sl st to first sc. Pull your magic ring closed very firmly.
Rnd 2: (Ch 10, sl in same st) 4 times. 5 ch lps made. Rpt for each st around. 80 ch lps
Finish off leaving a long tail. Being careful not to tie over any chain loops, tie the tails together very firmly. Use these tails to sew pom pom in place.
Bonus
Here’s a hint for attaching your pom pom to a hat. This is a very firm attachment and there is no knot on the inside to rub against a sensitive head!
Draw both tails through the top of the hat a couple of time. Then draw them back to the outside. Wind the tails in opposite directions a couple of times around the base of the pom pom and tie very firmly. Trim ends to just a little shorter than the the loops of the pom pom.
Need a pattern to attach your pom pom to? Here is my Basic Crochet Beanie Pattern for free!
Thanksgiving is over, and the Christmas season has started. Disney has blessed us this season by introducing us to an adorable Baby Yoda. Of course, I had to have one, so I made my own Baby Yoda!
And you can have one, too! Here’s the crochet pattern to bring home your own Baby Yoda. Merry Christmas!
Baby Yoda
Materials • Small amounts of worsted weight yarn in green and tan • Stuffing • 12mm safety eyes (I used the brown colored eyes) • Tapestry needle Abbreviations
ch(s) – chain(s) dec – decrease flo – front loop only lp(s) – loop(s) ml – magic loop rev sc – reverse single crochet rnd(s) – round(s) rpt – repeat sc – single crochet sc2tog – single crochet two together st(s) – stitch(es) yo – yarn over
Notes on Amigurumi
• When working in rounds, do not join. Just continue crocheting in the next stitch creating a spiral. Use an open stitch marker to keep up with beginning of round.
• Decrease: (Insert hook in flo of next stitch, yo, pull up a lp) twice, yo, pull through all 3 lps on hook.
• Invisible Finish Off: Pull the last lp up until tail comes through st. Using tapestry needle, sew tail under next st and then through the center of the previous st. Draw yarn to back and secure. Weave in end.
Instructions for Baby Yoda with attached coat
Head (green)
Rnd 1: Starting with a ml, ch 1, sc 6 times. 6 sc
Rnd 2: 2 sc in each sc around. 12 sc
Rnd 3: (2 sc in next st, sc in next st) around 18 sc
Rnd 4: (2 sc in next st, sc in next 2 sts) around 24 sc
Rnd 5: (2 sc in next st, sc in next 3 sts) around 30 sc
Rnds 6-8: Work 3 rnds even.
Rnd 9: (Dec over next 2 sts, sc in next 3 sts) around 24 sc
Rnd 10: (Dec over next 2 sts, sc in next 2 sts) around 18 sc
Rnd 11: (Dec over next 2 sts, sc in next st) around 12 sc
Add eyes in center of ball about 6 sts apart. Stuff firmly.
Rnd 12: Dec over next 2 sts around. Finish off leaving a long tail for sewing. 6 sc
Sew 1 long st each for top eye lid and bottom eyelid.
Ears (green)
Right Ear
Row 1: Ch 4, sc in 2nd st from hook. Turn. 1 sc, 2 chs
Row 2: Ch 1, sc in sc. Turn. 1 sc
Row 3: Ch 1, 2 sc in sc. Turn. 2 sc
Row 4: Ch 1, sc in each sc. Turn.
Row 5: Ch 1, 2 sc in first sc, sc in next sc. Turn. 3 sc
Row 6: Ch 1, sc in each sc. Turn.
Rpt last row twice more.
Ch 1. Rev sc in end of each row along long edge of ear. Reverse sc in first ch, 3 rev sc in second ch, rotate ear and rev sc in remaining loop of first ch. Continue rev sc in end of each row along edge of ear. Finish off leaving long tail for sewing.
Left Ear
Work rows 1-4 same as first ear.
Row 5: Ch 1, sc in first st, 2 sc in next sc. Turn. 3 sc
Row 6: Ch 1, sc in each sc. Turn.
Rpt last row twice more. Turn.
Sl st across 3 sts on end of ear. Finish the same as the other ear. Turn.
Sew on ears onto head in a slight curve.
Body (tan)
Rnd 1: Starting with a ml, ch 1, sc 6 times. 6 sc
Rnd 2: 2 sc in each sc around. 12 sc
Rnd 3: (2 sc in next st, sc in next st) around 18 sc
Rnd 4: (2 sc in next st, sc in next 2 sts) around 24 sc
Rnd 5: (2 sc in next st, sc in next 3 sts) around 30 sc
Rnd 6: (2 sc in next st, sc in next 4 sts) around 36 sc
Rnds 7-12: Work 6 rnds even.
Rnd 13: (Dec over next 2 sts, sc in next 4 sts) around 30 sc
Rnd 14: (Dec over next 2 sts, sc in next 3 sts) around 24 sc
Rnd 15: (Dec over next 2 sts, sc in next 2 sts) around 18 sc
Rnd 16: (Dec over next 2 sts, sc in next st) around 12 sc
Stuff.
Rnd 17: Dec over next 2 sts around. 6 sc
Finish off leaving a long tail for sewing. Whip st in each st around and cinch hole closed. Sew yarn through opposite end, pull tight and secure end.
Sew body to head.
Collar (tan)
Leaving a long tail for sewing, ch 5.
Row 1: Sc in second st and next 3 sts. Turn. 4 sc
Row 2: Ch 1, sc in each st. Turn.
Rpt row 2 until you have 37 rows or collar is long enough to wrap around the widest part of body with 3 extra rows overlapping.
Last row: Ch 1, sc 2 together twice. Invisible finish off.
Sew ends together with rounded end overlapping square end by a few rows. Slip collar around coat and sew in place.
I’ve just added a friendly ghost to my cast of characters on my Zombie Scarf! Here’s an update of knit charts for my zombie, biohazard, and new ghost! Enjoy!
Well, it’s not a rock ‘n’ roll tour, but it’s a class tour and I may be coming to a city near you!
Come by and see me at 2019 Fiber Fun in the ‘Sip in Vicksburg, MS September 26-28. I will be joined by other big names in fiber for a slate of classes unprecedented in Mississippi! Click here for a list of classes. Besides the classes, come visit the marketplace heaven for fiber enthusiasts. Click here for info on the vendor hall.
In October, you will find me in Ashville, NC for Southeastern Fiber Fair! I’m so excited to be joining this renowned and respected fiber festival October 24-27! Here are links for classes and event info. Or click the logos for more information on each festival.
Check out Katie Clark Crochet on Instagram and Facebook for updates on my classes and workshops.
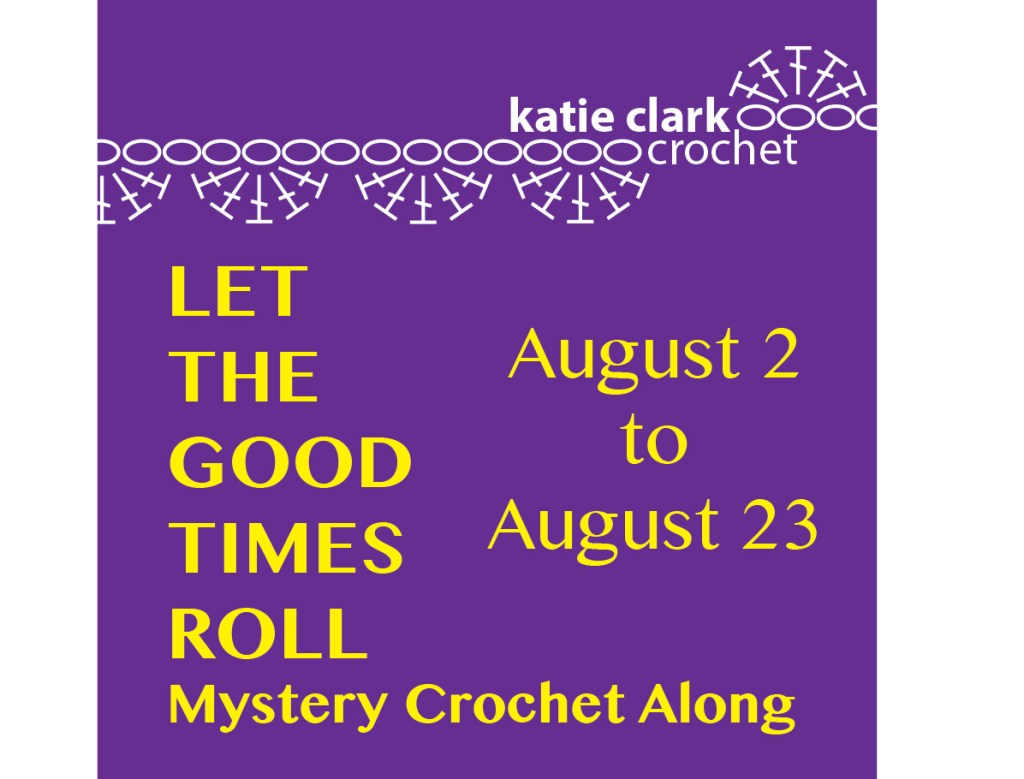
Let the Good Times Roll Shawl Mystery Crochet Along is live! We are gearing up for 2019 Fiber Fun in the ‘Sip with this fun MCAL. Our vendors have put together yarn kits especially for this pattern. Visit the Let the Good Times Roll page under the Patterns menu or click here for full details!
Ready to jump in? Preregister now!
Already registered? Bought your yarn? Tell us what colors you chose in the comments below!