The turkey is eaten and now we are diving straight into the Christmas season. It’s time to gather gifts for everyone special in your life. I like to shop for presents. (I’m almost done already!) But some gifts are homemade.
Teachers are one of the most special people in my life. I know how hard that job is. I appreciate all the people pouring themselves into my kid. So I like to show my gratefulness with a handmade crocheted gift.
I have a couple of rules for teacher gifts.
- It has to be unique. I want it to be something they can’t find anywhere else. So I try to make an original design every year, or at least adapt something so it’s truly special.
- It has to be something I would give a friend. No nose warmers or kitchy stuff. If it’s decor, it should be beautiful. If it’s functional, it should be useful and beautiful.
- It has to be quick. I wish I had time to make a sweater for every person who impacts my life and makes it fuller. But I don’t have that kind of time. My kid has 16 (what?!) teachers, helpers, coaches, etc. so my goal is a 30-60 minute make.
- The most important rule: It can’t be about teaching. Your kid is surprised to see his teacher in the grocery store, but you and I know she is a person-who does other things besides teach. I promise after the first year of teaching, your kid’s teacher has a lifetime’s worth of “World’s Greatest Teacher” mugs and pencil holders with apple motifs. The gifts that stand out show appreciation for the teacher as a person.
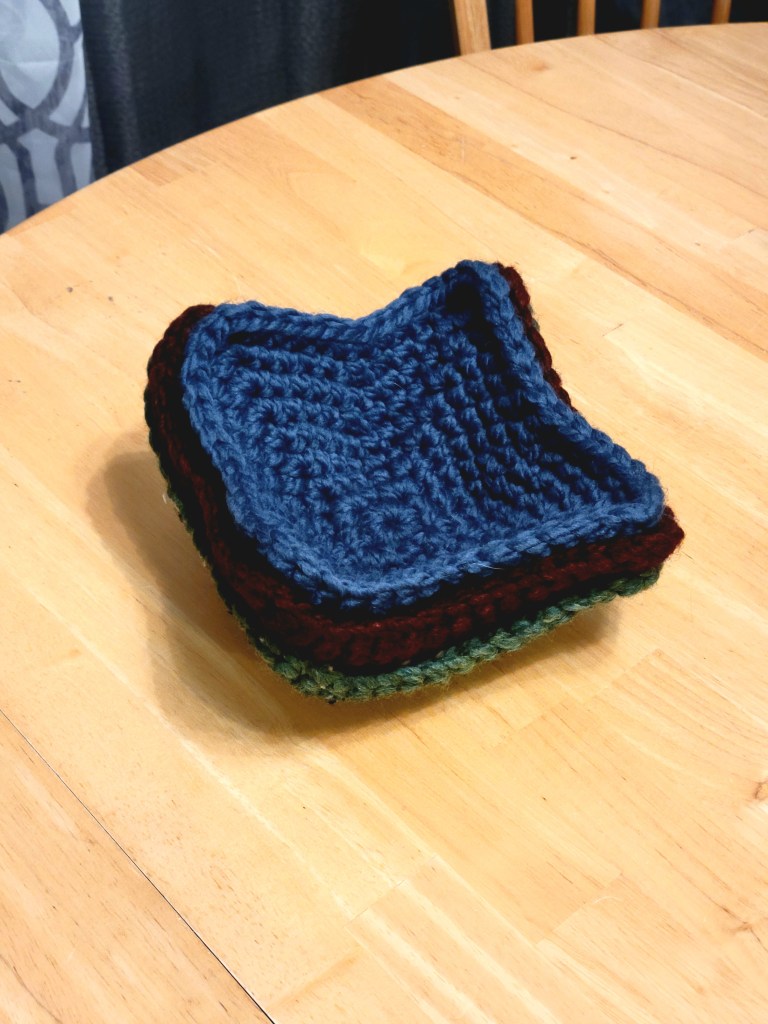
This year, I designed a soup bowl cozy. The shape is like a quilted soup bowl hot pad someone made for me. It comes up and around the bowl to protect your hands from a hot dish. It will perfectly fit a large Corelle cereal or soup bowl.
I hope during the holiday break, loved ones can cozy up by the fire with a hot bowl of chili or hearty soup and veg out to Christmas movies. Make some for teachers and friends. Send them to distant family members you want to hug. Make a few for your own family to have ready for a warm winter meal.

Soup Bowl Cozy
Difficulty
Advanced Beginner
Finished Measurements
7 inches x 7 inches x 2 inches
Made to fit a large (6″) Corelle soup or cereal bowl
Materials
40 yds super bulky (#6)
Hook size US N (9mm)
Samples shown using Lion Brand Wool-Ease Thick & Quick. I got 2 cozies out of each ball.
Gauge
9 sc/10 rnds = 4×4”/10x10cm
Notes
- Pattern is written in US terms and
Imperial measurements. - Work instructions in brackets [ ] the number of times indicated.
- For a more finished look, instead of a standard sc3tog work it as follows: Insert hook in the next front loop 3 times and pull up a loop, yo and pull through both loops on the hook.
- Find standard abbreviations here.
Bowl Cozy
Rnd 1: 8 sc in ML. Join with a sl st to the first sc.
8 sc
Rnd 2: Ch 1, 2 sc in the first st, sc in the next st, [3 sc in the next st, sc in the next st] 3 times, sc in the same st as the first sc. Join with a sl st to the first sc.
16 sc
Rnd 3: Ch 1, 2 sc in the first st, sc in the next 3 sts, [3 sc in the next st, sc in the next 3 sts] 3 times, sc in the same st as the first sc. Join with a sl st to the first sc.
24 sc
Rnd 4: Ch 1, 2 sc in the first st, sc in the next 5 sts, [3 sc in the next st, sc in the next 5 sts] 3 times, sc in the same st as the first sc. Join with a sl st to the first sc.
32 sc
Row 5: Ch 1, 2 sc in the first st, sc in the next 7 sts, [3 sc in the next st, sc in the next 7 sts] 3 times, sc in the same st as the first sc. Join with a sl st to the first sc.
40 sc
Row 6: Ch 1, 2 sc in the first st, sc in the next 3 sts, sc3tog, sc in the next 3 sts, [3 sc in the next st, sc in the next 3 sts, sc3tog, sc in the next 3 sts] 3 times, sc in the same st as the first sc. Join with a sl st to the first sc.
40 sc
Row 7: Ch 1, 2 sc in the first st, sc in the next 9 sts, [3 sc in the next st, sc in the next 9 sts] 3 times, sc in the same st as the first sc. Join with a sl st to the first sc.
48 sc
Rnd 8: Ch 1, 2 sc in the first st, sc in the next 4 sts, sc3tog, sc in the next 4 sts, [3 sc in the next st, sc in the next 4 sts, sc3tog, sc in the next 4 sts] 3 times, sc in the same st as the first sc. Join with a sl st to the first sc.
48 sc
Rnd 9: Ch 1, 2 sc in the first st, sc in the next 11 sts, [3 sc in the next st, sc in the next 11 sts] 3 times, sc in the same st as the first sc. Join with a sl st to the first sc.
56 sc
Rnd 10: Ch 1, 2 sc in the first st, sc in the next 13 sts, [3 sc in the next st, sc in the next 13 sts] 3 times, sc in the same st as the first sc. Join with a sl st to the first sc.
64 sc
Weave in ends. Block as desired.