Light Up the Holidays!

Happy Holidays, Merry Christmas and Happy New Year!

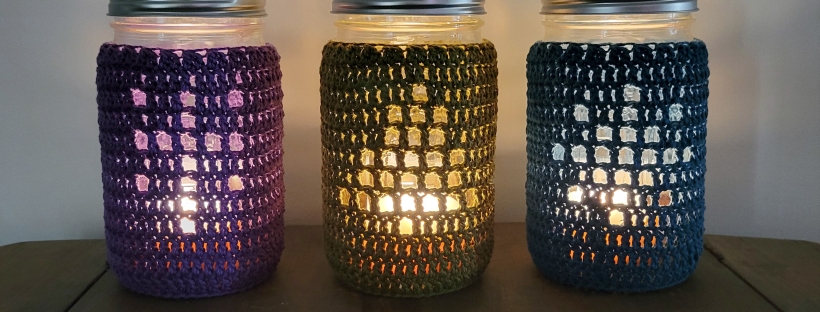
Add a little (or a lot!) of sparkle to your festive decor with decorative lanterns inside and out. Or make some last-minute gifts for family, friends, and teachers. These lanterns are awesome because they are so quick to make. It takes me less than 2 hours to make one!

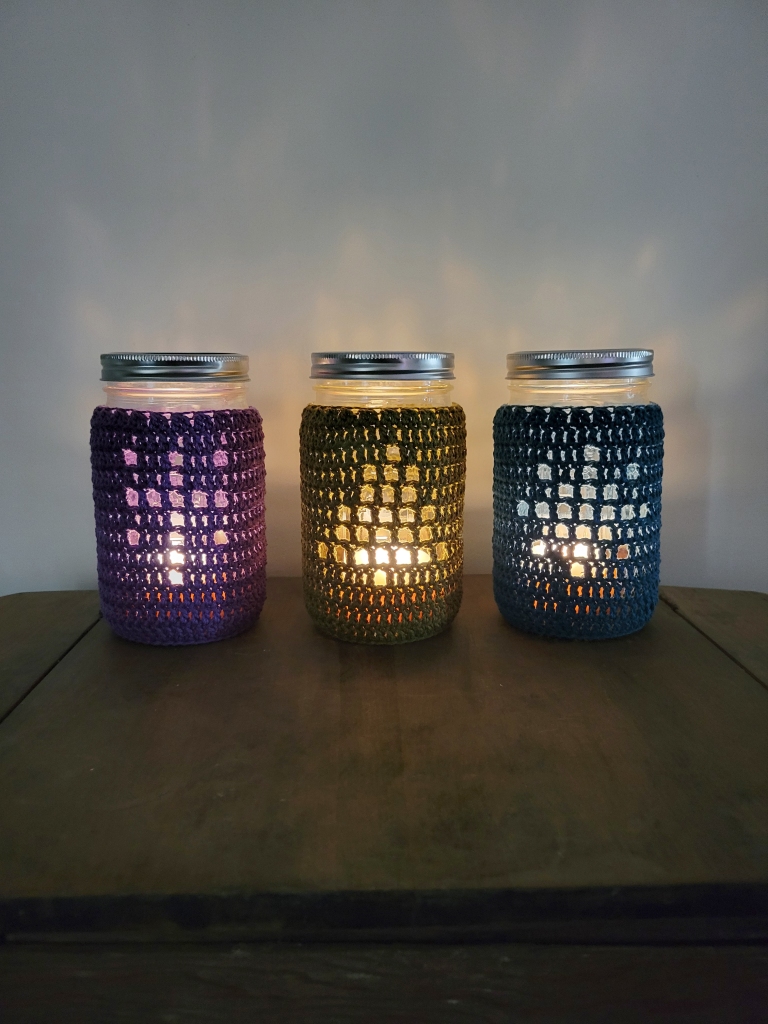
The filet crochet designs shown below of a Christmas star, tree, and snowflake are fun to make and are included in the pattern download. You can even share your creativity by designing your own chart! The instructions for making your own design are also in the pattern.

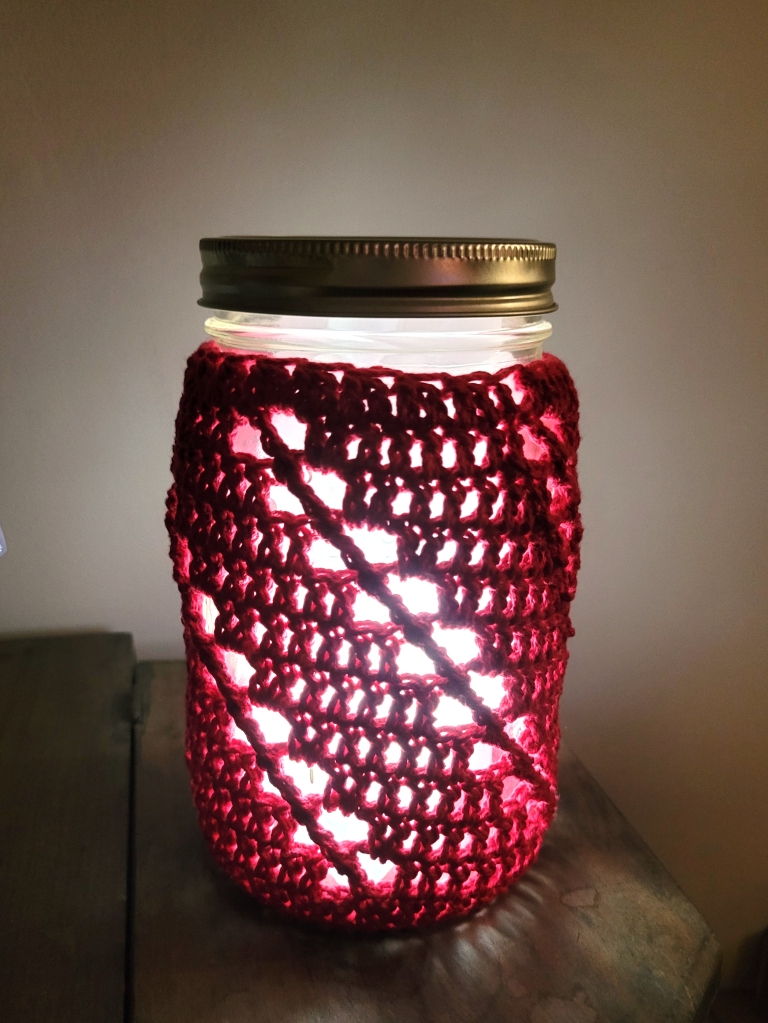
I love Christmas presents. Can I give you a Christmas present?? Below you can find the pattern for the Peppermint Stripe Lantern shown at the top left. I will leave it here for a limited time through Christmas. You can purchase the entire pattern including the filet crochet designs by visiting the Quart Jar Lantern page. And don’t forget to pop onto the Patterns page to find a pattern to gift a friend or yourself! Merry Christmas!!

Peppermint Stripe Lantern

Difficulty
Advanced Beginner

Finished Measurements
Lantern sleeve covers a 1 quart canning jar

Materials
Worsted weight mercerized cotton
(Fundamental Cotton in Lipstick Red by
Yarn Bee: 3.52 oz/164 yds), approx. 80-100 yds
US Size F/5 (3.75mm) hook
Tapestry needle
1 Quart canning jar
LED Puck light

Gauge
18 dc/9 rnds = 4×4”/10x10cm

Notes

  • Pattern is written in US terms and
    Imperial measurements.
  • Gauge is very tight to create a dense
    fabric that will block light. To make
    the design show up and contrast well,
    work chs a little looser compared to
    gauge.
  • Beginning ch 2 does not count as a
    stitch throughout.
  • The first st of every row is worked in
    the same st as the join.

Base

Ch 2.

Rnd 1: Work 8 sc in the second ch
from the hook, join with a sl st to the
first sc.
8 sc

Rnd 2: Ch 2 (does not count as a
st), work 3 dc in each st around, join
with a sl st to the first dc.
24 dc

Rnd 3: Ch 2, [2 dc, dc in the next st]
around, join.
36 dc

Rnd 4: Ch 2, [2 dc, dc in the next 3
sts] around, join.
45 dc

Rnd 5: Ch 2, working in the blo
around, [2 dc, dc in the next 8 sts]
around, join.
50 dc

Peppermint Stripe

Rnd 6: Ch 2, dc in the first st, dc in
the next 6 sts, [ch 2, dc in the next st,
sk 2 sts, dc in the next 7 sts] 4 times,
ch 2, dc in the next st, sk the last 2
sts, join with a sl st to the first dc.
40 dc, 5 ch-2 sp, (each repeat has 7
dc, 1 ch-2 sp, 1 diagonal dc)

Rnds 7-15: Sl st in the next 2 sts, ch
2, starting in the same st as the last
sl st [dc in the next 5 sts, 2 dc in the
ch-2 sp, ch 2, fptr around the post of
the diagonal st on the rnd below (that
is the st right after the ch-2 sp), sk 2
sts] 5 times, join to the first dc.
35 dc, 5 ch-2 sp, 5 tr (each repeat has
7 dc, 1 ch-2 sp, 1 tr)

Rnd 16: Ch 2, [dc2tog 3 times; work-
ing in the next st and the ch-2 sp,
dc2tog; working in the same ch-2 sp
and the top of the tr, dc2tog] around,
finish off with an invisible join.
25 dc

Finishing

Weave in ends.

If desired block as follows. Soak for
at least 20 minutes and press excess
water out with a towel. Stretch over a
1 quart canning jar and allow to dry.
I don’t recommend using a real flame
in this lantern because the cover is
flammable. I recommend using a bat-
tery operated LED light.

Get the full version!

Join the Sock KCAL!

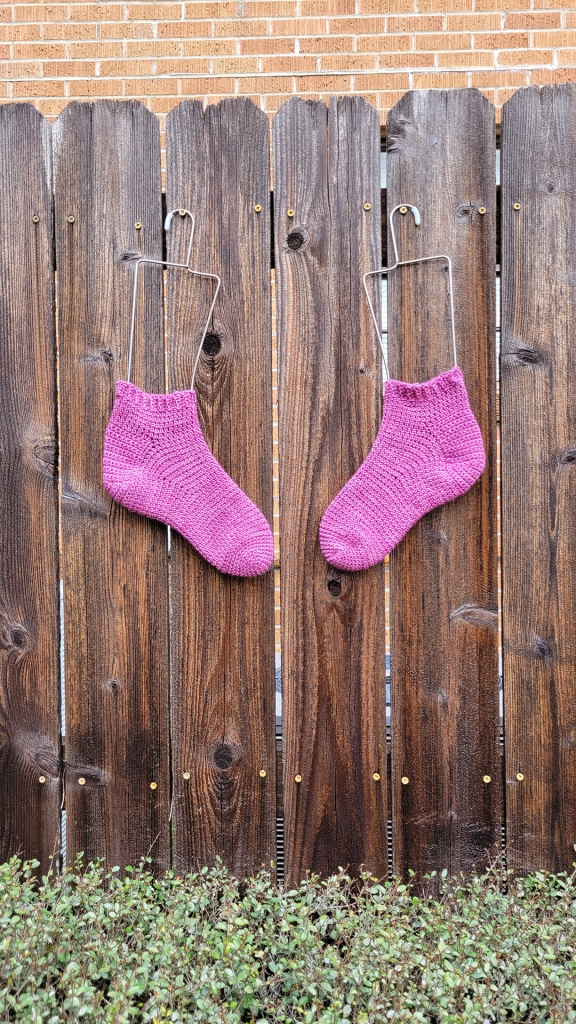
Today is the first day of the Jems Luxe Fibers Sock Knit and Crochet Along! We are going live on Zoom tonight, March 22nd, and every Tuesday night at 7pm c to learn together how to make the perfect socks. Contact Jems Luxe Fibers on Instagram for the Zoom link.

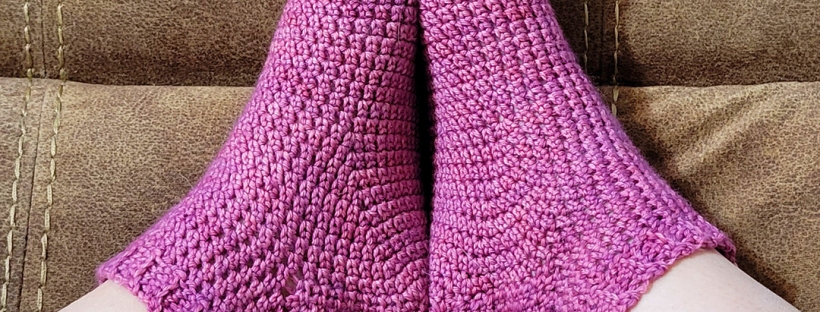
I have the perfect crochet pattern for the event. Let your favorite hand dyed DK yarn from Jems Luxe Fibers shine with the Vanilla Crocheted Socks. Cozy socks constructed with a traditional gusset and heel turn make a perfect fit. The pattern is free during the KCAL. Download it here!

Knitters can join in as well. You can download Crazy Sock Lady’s DK Weight Vanilla Socks here, also free! Or choose your own pattern. We always have a good time with Judy and Emily on Zoom.

Knitting a Top Down Sweater: Dividing for Sleeves

When you are knitting a top down sweater like a yoke or raglan pattern, after you complete the shoulders and top of bust, you will separate the sleeve stitches from the body stitches. The sleeve stitches will be held unworked as you finish the body down to the waist.

Joining the front and back of body creating a sleeve

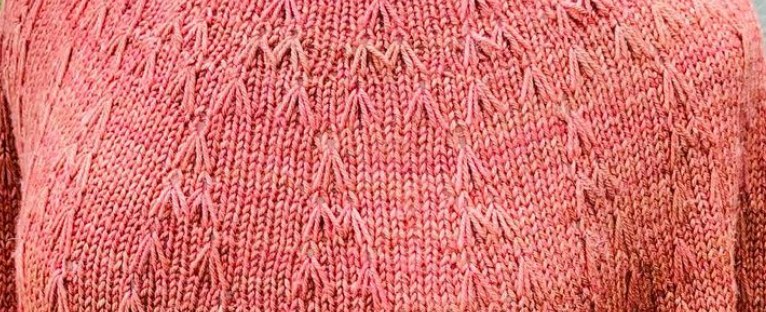
In the Fireworks pattern by Olive Knits, at the beginning of the round you will work a few extra stitches before you separate the body and sleeves. This is because your BOR (beginning of round) is at the top of the shoulder and you must first work to the stitches that will be under the arm. Where you place your first marker is going to be the new BOR. Then you will continue by working a certain number of stitches for the front, slipping the appropriate number of stitches for one arm PURLWISE onto waste yarn, adding a few stitches under the arm, working a certain number of stitches for the back (this brings the front and back together), slipping stitches purlwise for the other arm, adding stitches for under the other arm, and joining the back to the front.

For other top down patterns, the process is the same, but the position of the BOR will change the process a little. A well written pattern will give exact numbers of stitches to work and slip and in what order.

Most patterns suggest holding sleeve stitches on waste yarn. But if you have extra cables you can use those instead. It is important that you use a generous length of waste yarn or a long cable so it will be easy for you to try on your sweater. That’s one of the big advantages of making a top down sweater!

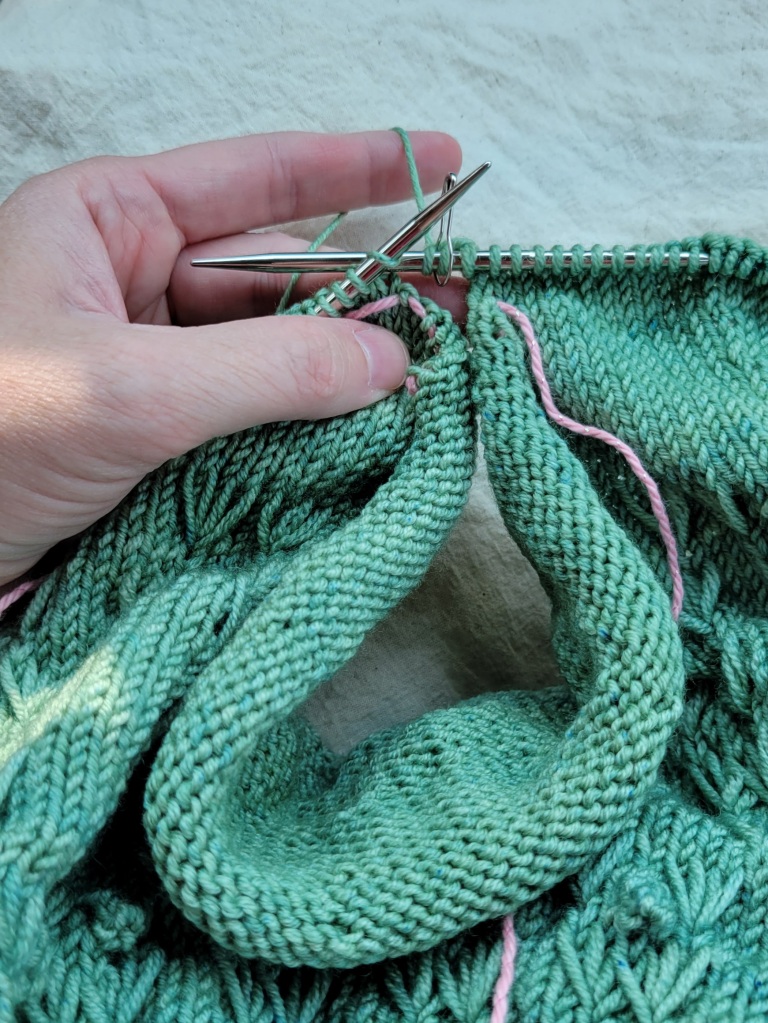
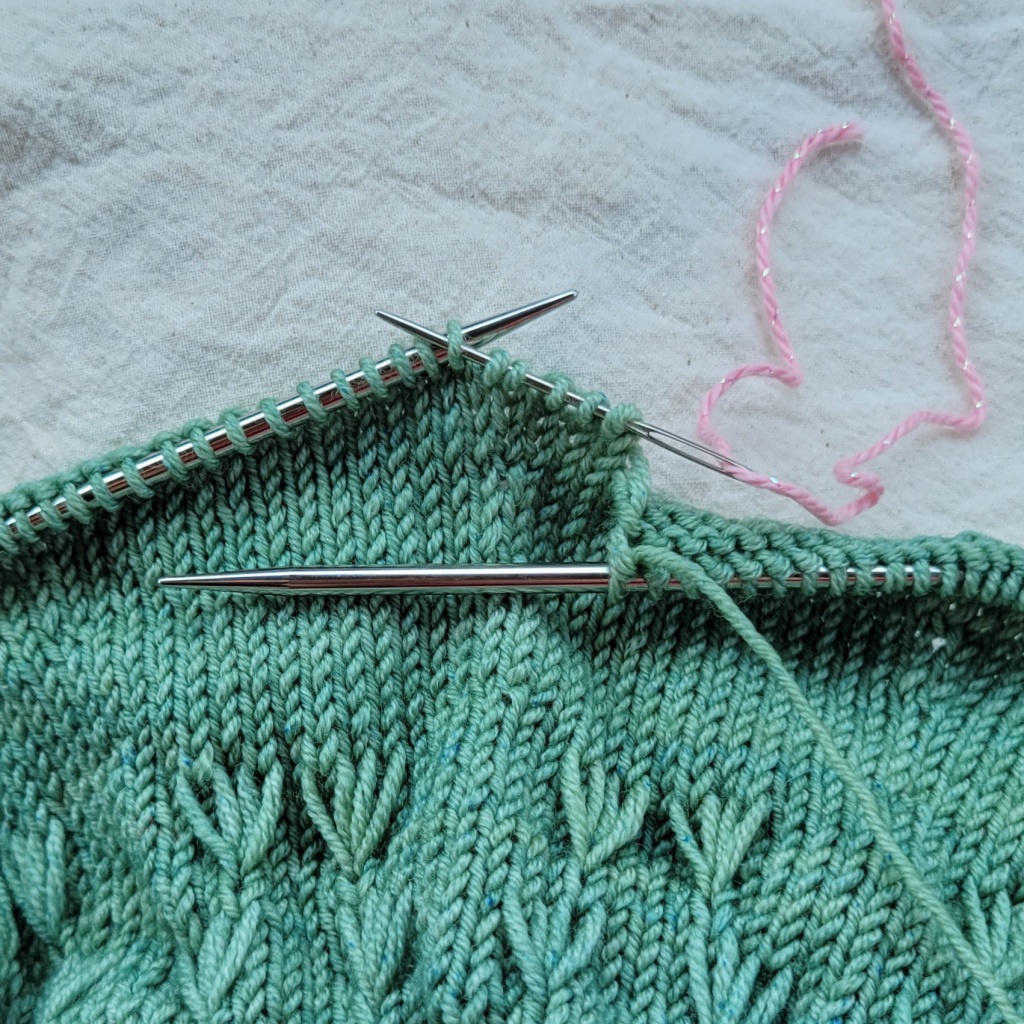
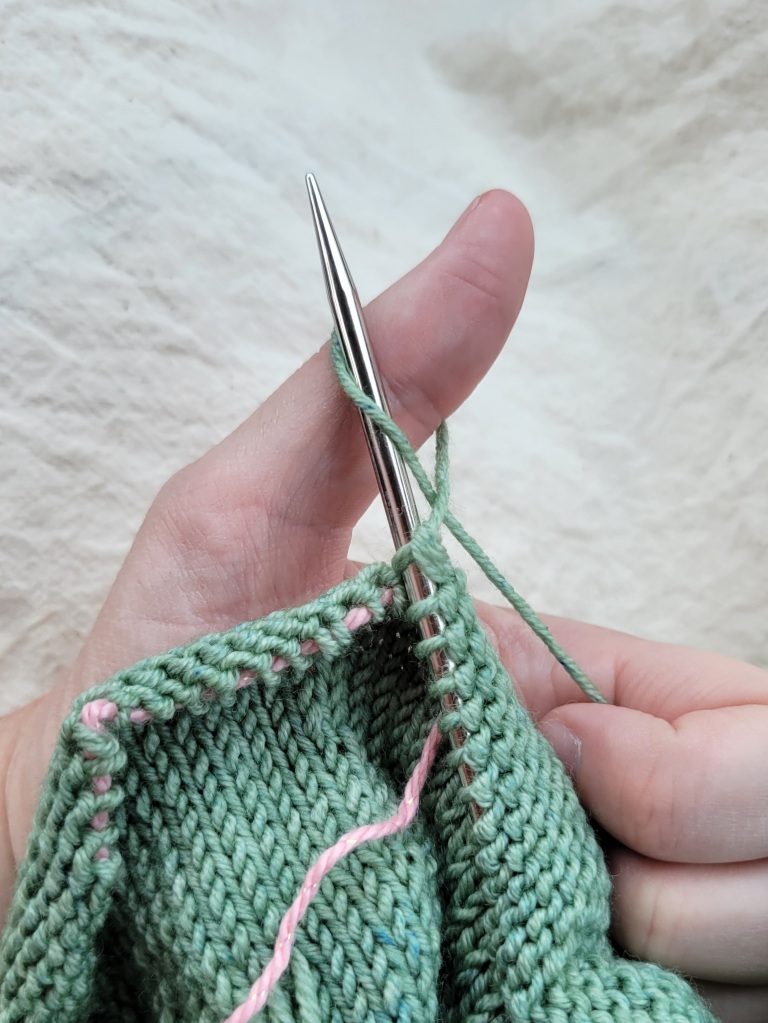
To slip stitches to waste yarn, you will need a tapestry needle and a generous length of waste yarn. (See images below) I recommend using a contrasting yarn in a lighter weight than your work. Thread your waste yarn on your tapestry needle, but don’t knot it. Slip stitches PURLWISE onto the tapestry needle the same way you would slip them from the left to the right needle. Continue working your stitches down your waste yarn, but don’t let them fall off the other end! When you have the appropriate number of stitches slipped for one sleeve, tie the ends of your waste yarn together so you don’t drop the stitches. Be sure to leave plenty of room for you to try on your sweater.

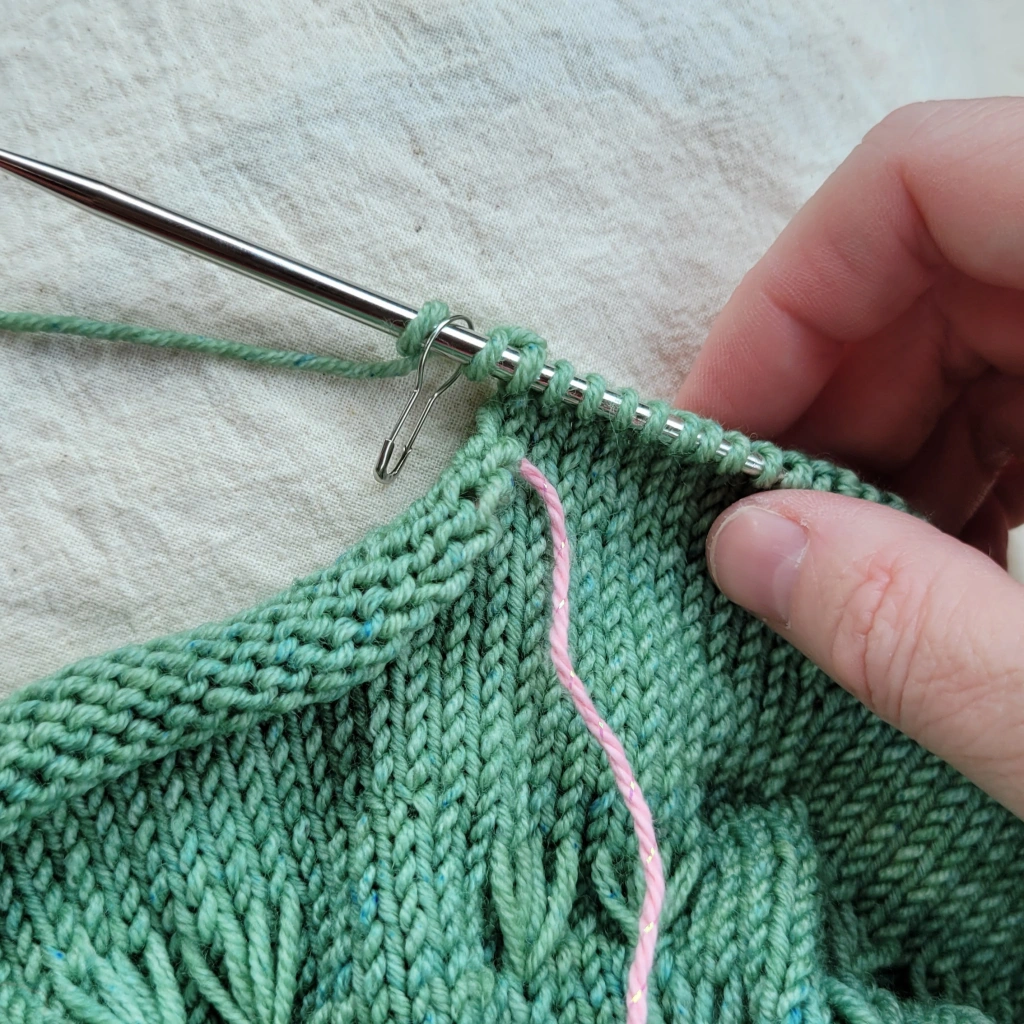
If you are using cable needles, use any needle size smaller than what you are knitting with. This keeps from stretching your stitches and changing the gauge. Slip stitches PURLWISE from the left needle to the new cable being careful to not let them slip off the other end. Secure your needles together so stitches won’t fall off as you are working the body. Be sure to use a cable long enough to allow you to try on your sweater!

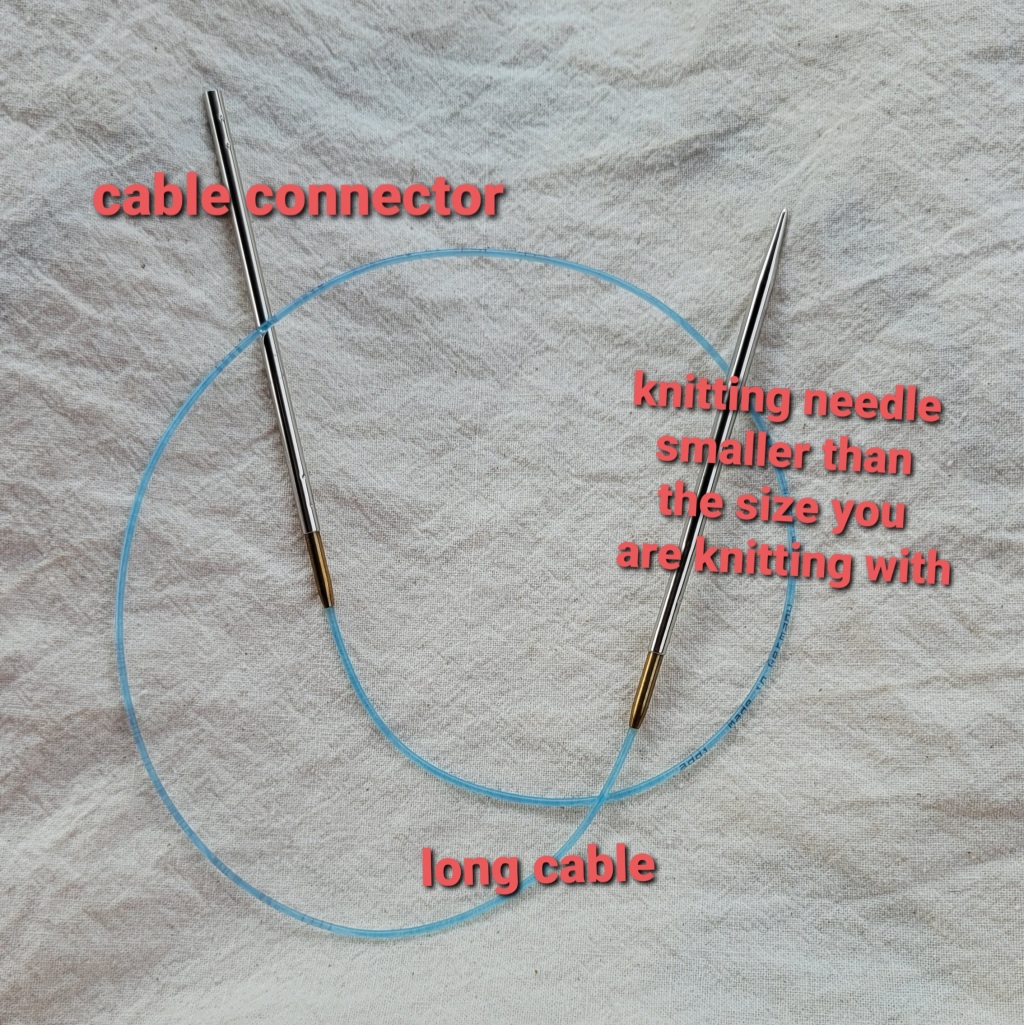
My favorite way to hold sleeve stitches is on an interchangeable cable so the needles don’t get in the way. For this technique, you will need:

  • an extra cable long enough to allow you to try on your sweater
  • a needle any size smaller than what you are knitting with
  • something to secure your cable, like a connection piece or stoppers

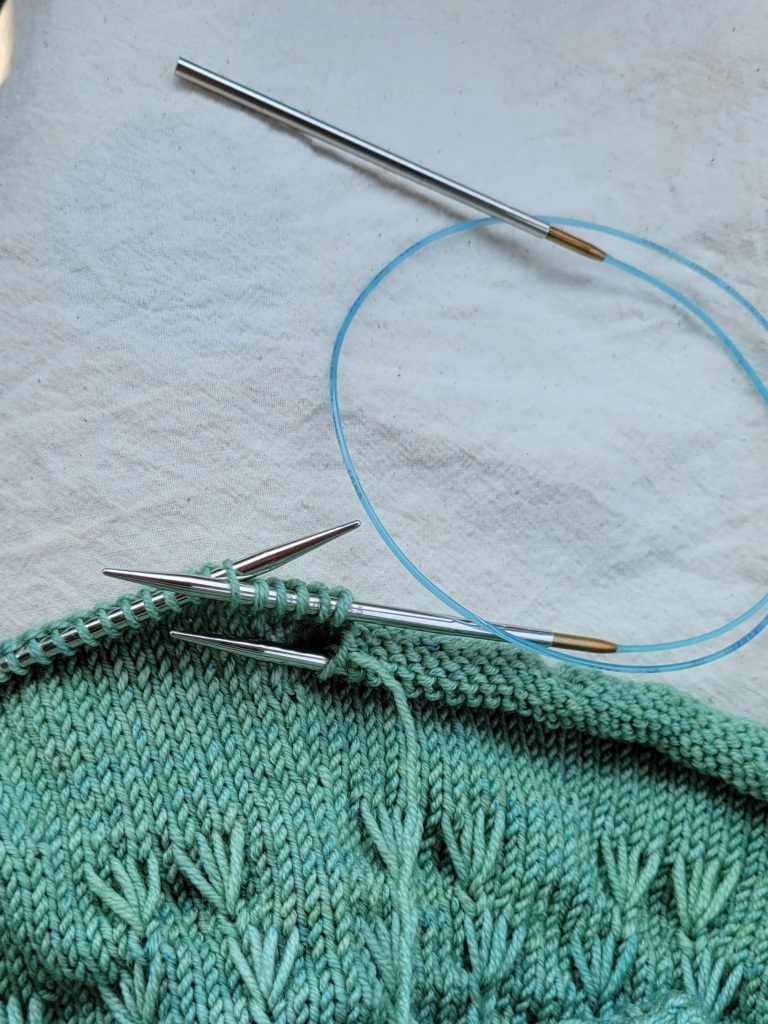
Attach the needle to one end of the cable and a connection piece or a stopper to the other end. Slip your stitches PURLWISE as described. Then replace the needle with the other end of the connection piece or the other stopper.

After your sleeves are separated from the body, you are ready to work the rest of the body! You will come back to the sleeves after the body is complete.

Find more details on the Fireworks KAL here.

Slipping stitches purlwise onto waste yarn
Backward loop cast on under the arm
Add marker between 2 cast on stitches to mark the center under the arm
Materials for holding stitches on an interchangeable needle cable
Slipping stitches onto a cable

Get Your Swatch On!

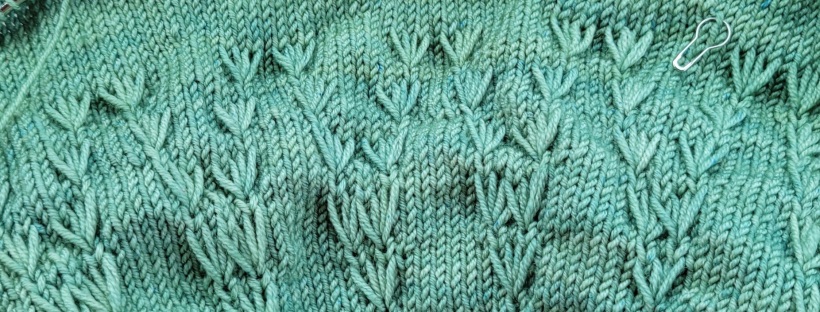
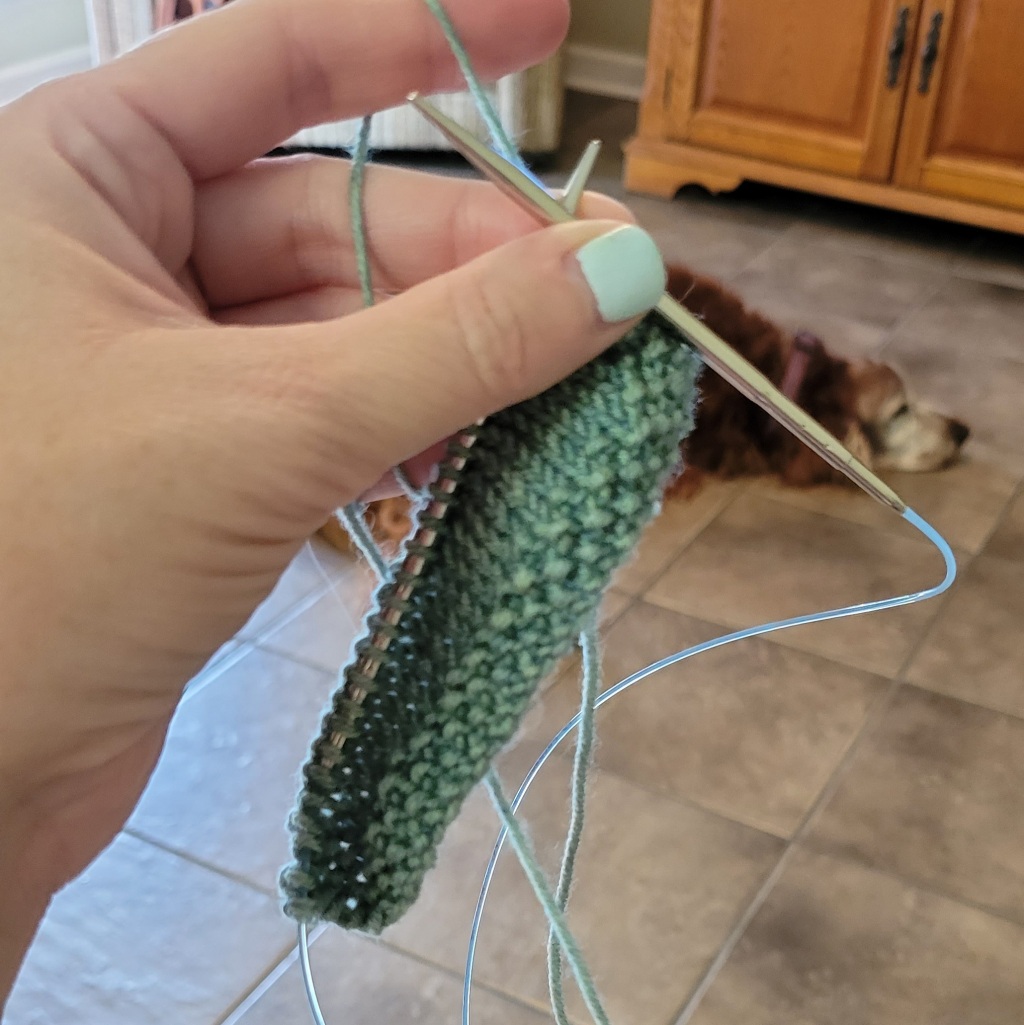
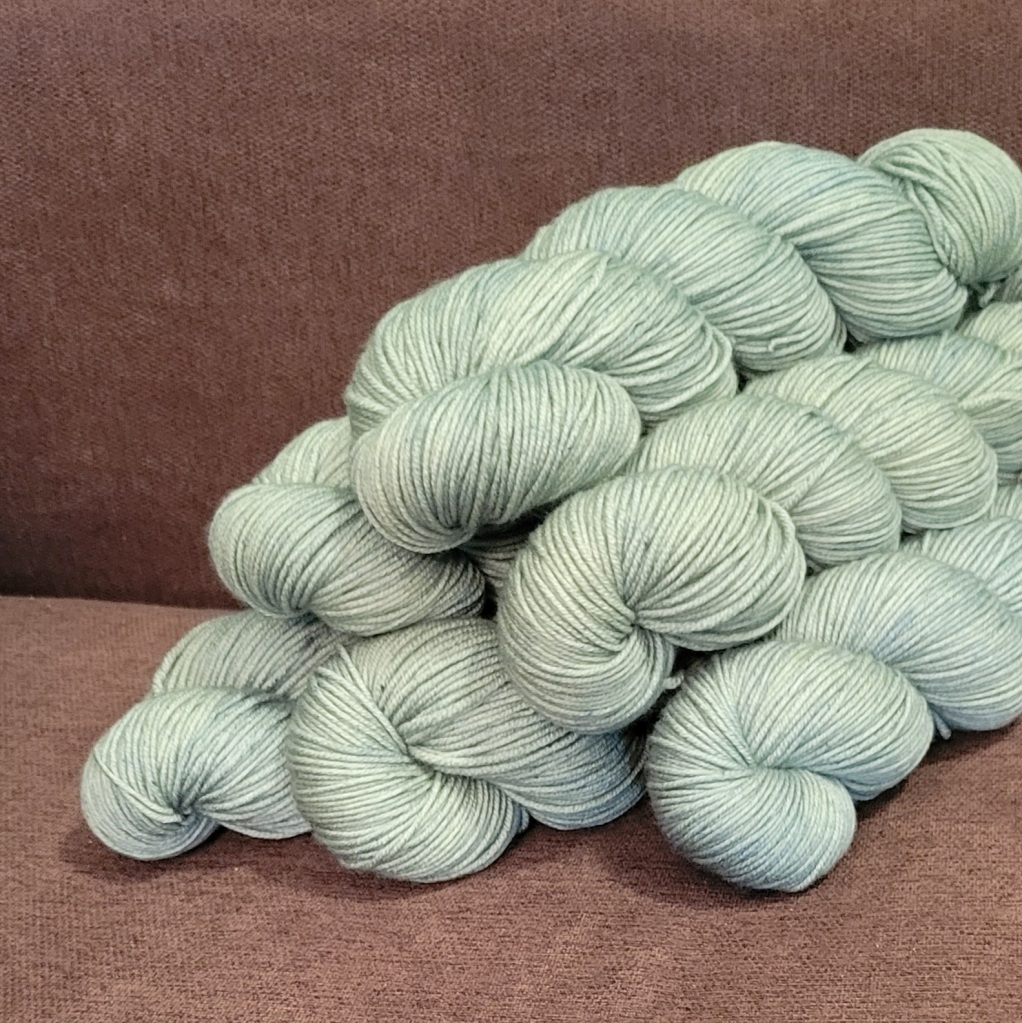
My beautiful yarn came in from Jems Luxe Fibers so I’m swatching for the Fireworks 4 Day KAL today! Look below for a peek at the colorway I ordered. If you are just joining us, get all the Fireworks KAL details here.

If this is your first time swatching, here are a few of tips.

  • Use your size 6 needles because you want to use the needles you’re going to use for the body of the sweater.
  • Cast on more than 20 stitches. The edges tend to warp a little bit, so you won’t get an accurate measurement if you count the stitches on the edge.
  • Your swatch should be a little more than 4″ x 4″ of stockinette stitch (k on one side, p on the other). There’s no “right” way to do it other than that. But if you like specific directions, I’ll post row by row directions below.
  • Notice the gauge says the swatch should be “blocked.” For the most accurate gauge, wash your block the same way you’ll wash your finished piece. When you wash different fibers, they may grow or shrink, so you’ll definitely want to take that into account for your sweater.

Let me know if you have any other questions! Happy swatching!

Swatch pattern

Cast on 28 sts.

Row 1: (K1, P1) across.

Row 2: (P1, K1) across.

Rpt rows 1 & 2.

Row 4: (K1, P1) twice, K 20, (K1, P1) twice.

Row 5: (P1, K1) twice, P 20, (P1, K1) twice.

Rpt rows 4 & 5 thirteen more times.

Rpt rows 1 & 2 twice. Bind off.

Luxe DK in colorway Euclase by Jems Luxe Fibers

Welcome to the Fireworks KAL!

This is your Olive Knits Fireworks Sweater Headquarters! Here, you can find links to everything you need to participate in the Fireworks Knitalong throughout the month of July. Let us know you are knitting with us by signing up here. If this is your first sweater, great! I’ll also have a variety of resources available to you to make it fun and easy.

A huge thanks to Olive Knits for organizing this worldwide KAL, and to Jems Luxe Fibers for hosting our small group KAL! First, bookmark these websites for easy access:

https://www.oliveknits.com/fireworks-4day-kal/ Olive Knits Fireworks KAL page: Contains the Pattern Details link, Events Timeline, Swag and much more!

https://jemsluxefibers.com/ Jems Luxe Fibers for ordering yarn.

https://www.facebook.com/groups/758681594755974 Join Jems: For the Love of Knitting and Cooking Facebook Group for meetings, updates, and to share progress.

https://katieclarkcrochet.com/ I’m your hostess and KAL leader! Look here for resources, videos, updates, tips and more. Email me at KatieClarkCrochet@gmail.com for personalized help along the way!

Event Dates

June 22nd: Swatch Party: Zoom party hosted by Jems Luxe Fibers, See Jems: For the Love of Knitting and Cooking Facebook Group for details about how to participate

July 1st: Virtual Cast On Party – Livestream: Hosted by Olive Knits

July EVERY TUESDAY: Weekly Zoom meetings hosted by Jems Luxe Fibers, See Jems: For the Love of Knitting and Cooking Facebook Group for details about how to participate

• July 6: Working the yoke

• July 13: Dividing for the body and working the body

• July 20: Working the sleeves

• July 27: Finishing

July ALL MONTH: Weekly livestreams and prize drawings with Marie on Facebook 

July 30th: Official end of KAL and Virtual Bind Off Party – Livestream

What You May Have Missed

• Order your pattern and yarn ASAP! The pattern is discounted for a limited time only. Order your yarn soon so you will receive your order in time to cast on with us!

• Let us know you are knitting with us by signing up here.

• June 7: Olive Knits unveils the Fireworks Sweater! View the video here.

Resources

Learn tips and tricks for swatching here.

• Video: How to read the information in the Pattern details, what materials you will need, and prepare to swatch

• Photo Tutorial on Dividing the Sleeves in a top down sweater

• Find errata on the Fireworks Pattern at the bottom of this page.

If you are enjoying this KAL and the resources I have provided, you can show your appreciation!

• View, Like, Subscribe, and Share my content on Instagram @katie_clark_crochet, Facebook @katieclarkcrochet, and here at https://katieclarkcrochet.com

• Consider leaving a tip in my Tip Jar!

Christmas in September

2020 has been something else, hasn’t it?! I don’t know about you, but I’m looking forward to the end of the year! There has to be a light at the end of this tunnel. And it should have something to do with Christmas. And yarn. How about a crochet along?

Forbidden Fiber Company is introducing this year’s advent calendar, and it’s gonna be so fun! It’s a White Elephant Advent Calendar! Have you played a White Elephant or Dirty Santa gift exchange? It’s like that. You choose a squishy present out of the box and see what you get. If you like it, you keep it to use in your pattern today. If you don’t, put it back and choose another! The catch is, you eventually get to keep them all!

The White Elephant Advent Calendar comes with everything you need to complete a surprise pattern by the end of the month: 18 coordinating hand-dyed mini-skeins, A MKAL (knit) pattern designed by Afifa Knits OR MCAL (crochet) pattern designed by me, Katie Clark, and a few extra goodies throughout the month.

If you choose the crochet option, find me on Facebook along the way for help, tips, and a good time! Are you ready to get started? Find the MCAL pattern here.

Traveling with Stitch Markers

I just got back from Boston, and I didn’t lose a single stitch marker! That is a big feat after knitting on airplanes and subways and in meetings (don’t tell!) and sessions. I usually drop stitch markers just sitting on the couch, so I had to figure out a way to hold on to them. My secret is a life line for my stitch markers. Here’s how I did it.

Set up:

Thread the Life Line through markers
with a tapestry needle.
  1. Choose a sock weight yarn in contrasting color. Cut a length at least as long as your needles and up to as wide as your project’s finished size.
  2. With your stitch markers in place on the needles, thread the life line through each stitch marker on your needles.
    • If you have to add stitch markers throughout your pattern, I recommend using open stitch markers that clip closed or bulb pins so you can add them to the life line later.
    • If you use closed markers, you must add them to the life line in the correct place before you continue to step 3. They will dangle from your life line as you work, and that’s ok.
  3. Choose 2 extra stitch markers the same size or bigger. Tie one to each end of your life line to keep it from becoming loose from your work. Your last marker can stay on the needle or dangle free.

Working with the Life Line:

  • Always keep the life line on the same side throughout your row.
  • Do not allow the life line to wrap or yarn over your needles as you work.
  • I recommend working with the life line on the side facing you. Stitch to the first marker. With the life line in front, slip marker purlwise.
Stitched over marker
This is what it looks like when you carry your life line on the opposite side and you slip the marker with the yarn in back.
  • If you have to turn in the middle of the row (for example, when working wraps and turns), the life line must fall to the side away from you. In this case, work to the marker, and with the working yarn in front, slip the marker purlwise. If you don’t do this, the marker will be stitched in like this:

Trouble shooting:

  • If you stitch over your marker as above, you can continue your row. When you come back to the marker, slip it off the needle, pull the marker through the stitch to free it, and place it back on the needle.
  • If you wrap or yarn over your life line, it will become entangled in your work. You must unknit back to the mistake and unwrap the life line from the needle.
  • I prefer using bulb pins with this technique. The large end sits in place on the needle and the small end dangles down a little bit allowing the life line to hang out of your way as you stitch.

Zombies are Crap at Knitting

crochet knit icon

But I love stitching them! I made a double knit Zombie Scarf that is sure to keep my brother-in-law warm in the zombie apocolypse!

And, so everyone will be prepared for the impending doom, here are charts you can use for knitting, cross stitching, needlepoint, or any reason you might have for needing to stitch zombies. Included are a zombie head, Crossed Winchester rifles, and a biohazard. If you would like to duplicate my scarf above download the full pattern here. If you have never tried double knitting, you will want to start with a simpler pattern like my Double Knit Scarf pattern. Enjoy!

Art & Craft: What’s the difference?

crochet knit iconI’m so excited to have my work shown in the Mississippi Museum of Art this Thursday, September 20th. The museum is featuring work from the Craftsmen’s Guild of Mississippi in their Third Thursday event this month.

I consider myself lucky that even as a kid, I knew I wanted to be an artist. When I would visit the museum, I dreamed of having my work displayed here. In high school, I had my first opportunity when my drawings and paintings hung as part of the Scholastic Art Awards competition. Now, almost 30 years later, here I am again as a Craftsman!

I find that often in public displays, “art” and “craft” are often separated pretty sharply. I have wondered why that is. In my experience, they are the same, just different media. In any medium, you learn the basic technique first, then you increase your skill by replicating various techniques of the masters. Finally, you rework and extend your technique to create unique pieces. In both cases, when your proficiency and originality reach a high standard as judged by peers in your medium, you become a master.

So, what is the difference? Is it the difference between utilitarian and decorative? Innovation versus tradition? Beauty versus expression? The quality of the work versus the fame of the artist? If you would like to know more about the history of the divergence between art and craft, here is an interesting TedEd.

Top left: Traditional Granny Square afghan made for me by my MIL. <3<3<3
Top right: Granny square hexagon motif used to make Christmas stocking by Katie Clark
Bottom: Detail of table decoration using traditional filet crochet technique by Katie Clark
All images copyright Katie Clark.