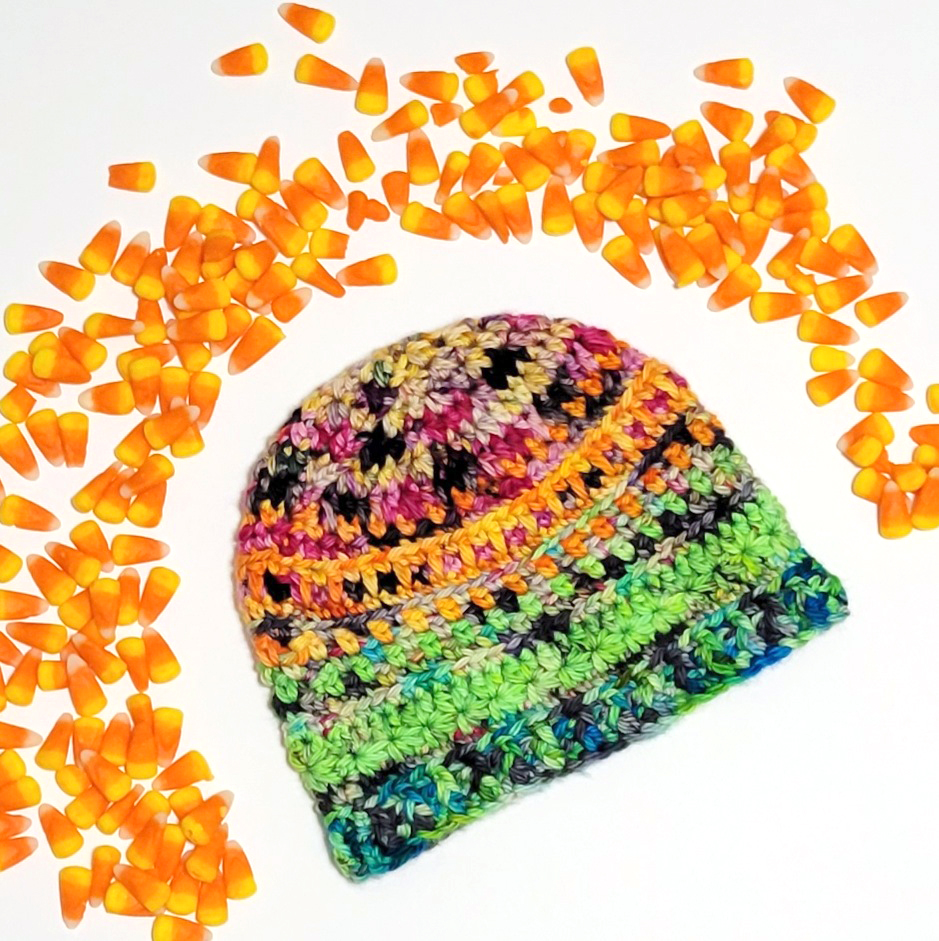
I had a lot of fun partnering with Jems Luxe Fibers for their Trick or Treat advent box in October! I may or may not have been directly responsible for one of the tricks. I can admit, I am directly responsible for one treat: the crochet pattern included in the kit, the Winter Twilight hat! The pattern really shows off Jems’ stunning color palette that tells the story of the three witches of mythology who had to share an eye!
So now, the tricks of Halloween can be your treat! The pattern is great for any of the Monstrous Mini bulky sets from Jems Luxe Fibers. Check out the version below using the Apollo Collection. The blues and whites are perfect for ushering in winter snowfalls. And the Star Stitch detail evokes thoughts of twinkling stars in the clear cold night or snowflakes on a sunny winter day.
I hope you enjoy this trick-turned-treat!
Winter Twilight Hat using Monstrous Minis in the Apollo collection from Jems Luxe Fibers
Thanksgiving is over, and the Christmas season has started. Disney has blessed us this season by introducing us to an adorable Baby Yoda. Of course, I had to have one, so I made my own Baby Yoda!
And you can have one, too! Here’s the crochet pattern to bring home your own Baby Yoda. Merry Christmas!
Baby Yoda
Materials • Small amounts of worsted weight yarn in green and tan • Stuffing • 12mm safety eyes (I used the brown colored eyes) • Tapestry needle Abbreviations
ch(s) – chain(s) dec – decrease flo – front loop only lp(s) – loop(s) ml – magic loop rev sc – reverse single crochet rnd(s) – round(s) rpt – repeat sc – single crochet sc2tog – single crochet two together st(s) – stitch(es) yo – yarn over
Notes on Amigurumi
• When working in rounds, do not join. Just continue crocheting in the next stitch creating a spiral. Use an open stitch marker to keep up with beginning of round.
• Decrease: (Insert hook in flo of next stitch, yo, pull up a lp) twice, yo, pull through all 3 lps on hook.
• Invisible Finish Off: Pull the last lp up until tail comes through st. Using tapestry needle, sew tail under next st and then through the center of the previous st. Draw yarn to back and secure. Weave in end.
Instructions for Baby Yoda with attached coat
Head (green)
Rnd 1: Starting with a ml, ch 1, sc 6 times. 6 sc
Rnd 2: 2 sc in each sc around. 12 sc
Rnd 3: (2 sc in next st, sc in next st) around 18 sc
Rnd 4: (2 sc in next st, sc in next 2 sts) around 24 sc
Rnd 5: (2 sc in next st, sc in next 3 sts) around 30 sc
Rnds 6-8: Work 3 rnds even.
Rnd 9: (Dec over next 2 sts, sc in next 3 sts) around 24 sc
Rnd 10: (Dec over next 2 sts, sc in next 2 sts) around 18 sc
Rnd 11: (Dec over next 2 sts, sc in next st) around 12 sc
Add eyes in center of ball about 6 sts apart. Stuff firmly.
Rnd 12: Dec over next 2 sts around. Finish off leaving a long tail for sewing. 6 sc
Sew 1 long st each for top eye lid and bottom eyelid.
Ears (green)
Right Ear
Row 1: Ch 4, sc in 2nd st from hook. Turn. 1 sc, 2 chs
Row 2: Ch 1, sc in sc. Turn. 1 sc
Row 3: Ch 1, 2 sc in sc. Turn. 2 sc
Row 4: Ch 1, sc in each sc. Turn.
Row 5: Ch 1, 2 sc in first sc, sc in next sc. Turn. 3 sc
Row 6: Ch 1, sc in each sc. Turn.
Rpt last row twice more.
Ch 1. Rev sc in end of each row along long edge of ear. Reverse sc in first ch, 3 rev sc in second ch, rotate ear and rev sc in remaining loop of first ch. Continue rev sc in end of each row along edge of ear. Finish off leaving long tail for sewing.
Left Ear
Work rows 1-4 same as first ear.
Row 5: Ch 1, sc in first st, 2 sc in next sc. Turn. 3 sc
Row 6: Ch 1, sc in each sc. Turn.
Rpt last row twice more. Turn.
Sl st across 3 sts on end of ear. Finish the same as the other ear. Turn.
Sew on ears onto head in a slight curve.
Body (tan)
Rnd 1: Starting with a ml, ch 1, sc 6 times. 6 sc
Rnd 2: 2 sc in each sc around. 12 sc
Rnd 3: (2 sc in next st, sc in next st) around 18 sc
Rnd 4: (2 sc in next st, sc in next 2 sts) around 24 sc
Rnd 5: (2 sc in next st, sc in next 3 sts) around 30 sc
Rnd 6: (2 sc in next st, sc in next 4 sts) around 36 sc
Rnds 7-12: Work 6 rnds even.
Rnd 13: (Dec over next 2 sts, sc in next 4 sts) around 30 sc
Rnd 14: (Dec over next 2 sts, sc in next 3 sts) around 24 sc
Rnd 15: (Dec over next 2 sts, sc in next 2 sts) around 18 sc
Rnd 16: (Dec over next 2 sts, sc in next st) around 12 sc
Stuff.
Rnd 17: Dec over next 2 sts around. 6 sc
Finish off leaving a long tail for sewing. Whip st in each st around and cinch hole closed. Sew yarn through opposite end, pull tight and secure end.
Sew body to head.
Collar (tan)
Leaving a long tail for sewing, ch 5.
Row 1: Sc in second st and next 3 sts. Turn. 4 sc
Row 2: Ch 1, sc in each st. Turn.
Rpt row 2 until you have 37 rows or collar is long enough to wrap around the widest part of body with 3 extra rows overlapping.
Last row: Ch 1, sc 2 together twice. Invisible finish off.
Sew ends together with rounded end overlapping square end by a few rows. Slip collar around coat and sew in place.